The CRM Calendar shows past, present and future tasks or appointments.
The Calendar can be viewed from Outlook or Google Calendars, but the appointments can not be edited from the external calendars.
For information on how to access the calendar, refer to the Calendar article.
Instructions
Integration with Outlook
You are able to see items from your CDS database calendar in your Outlook calendar: however you will not be able to edit them within Outlook.
Outlook calendar items cannot be displayed in your CDS database calendar.
Step 1. Log into your CRM database (refer to Logging On for further information).
Step 2. Click My Account in the top right-hand corner

Step 3. Click Edit
Step 4. Scroll down to Calendar Options and locate the Publish Key field.
Enter a key of your choice (eg. jsmithcalendar), then select Save.

Step 5. Scroll back down to Calendar Options, and copy the URL located in the Publish at My Location field.
Step 6. Open your calendar in Outlook, and right-click on My Calendars on the bottom left-side of the screen.
Step 7. Select Add Calendar and then select the From Internet… option from the drop-down list.
Step 8. Paste the Publish at My Location URL in the new window
Step 9. Select OK to start the calendar syncing process.
Integration with Google Calendar
You are able to see items from your CDS database calendar in your Google calendar: however you will not be able to edit them within the Google Calendar.
Step 1. Log into your CRM database (refer to Logging On for further information).
Step 2. Click My Account in the top right-hand corner

Step 3. Click Edit
Step 4. Scroll down to Calendar Options and locate the Publish Key field.
Enter a key of your choice (eg. jsmithcalendar), then select Save.

Step 5. Scroll back down to Calendar Options, and copy the URL located in the Publish at My Location field.
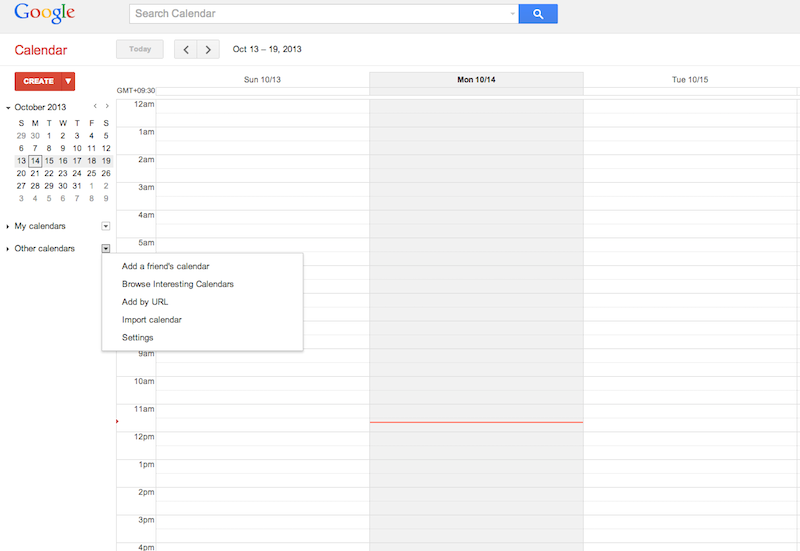
Step 6. Open your Google calendar, and click on the arrow pointing downwards next to Other Calendars on the left-side of the screen.

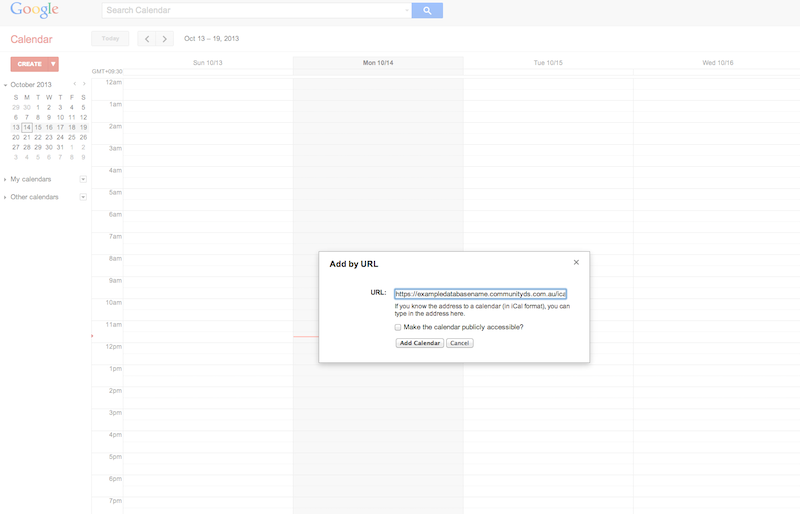
Step 7. Select Add By URL and paste the Publish at My Location URL in the URL field that appears in the new window.

Step 8. Select Add Calendar to start the calendar syncing process.
Further Information
For further information, refer to the following articles:
