The CRM database Case Management functionality is tailored to each organisation. Your Case Management pages may have a slightly different appearance.
When a client enters a case management service, a new case is created.
Instructions
Step 1. Log into your CRM database (refer to Logging On for further information).
Step 2. Find the record for the required Client.
If the client does not exist in your database, add a client record.
Step 3. Scroll to the Program Services section of the Client Record

Step 4. Check for any current cases
Step 5. Click Create
Step 6. Enter the required information for the Program Services Case record.
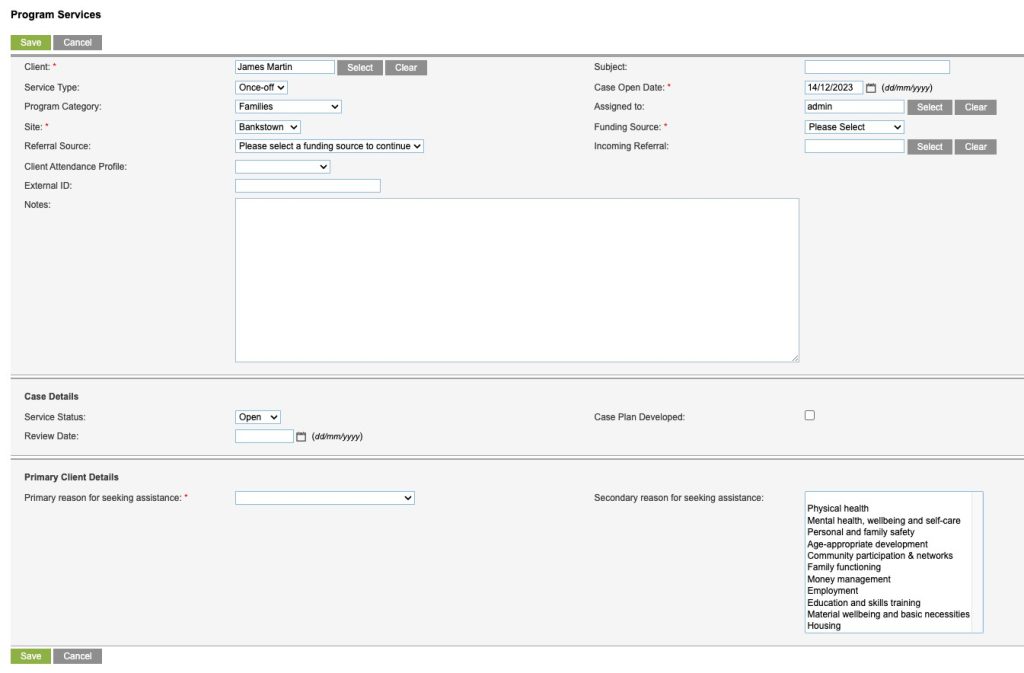
- Client
- automatically added when the case is created from a client record
- Subject
- Enter a short title for the Case
- Service Type
- Select Once-off or Case File
- Case Open Date
- The Open date will automatically populate with the date you are creating the record. This can be edited if required.
- Program Category
- Select from the Category that best describes the case
- Assigned to
- automatically populated with the user ID of the person creating the case. This can be edited if the case is being managed by another person.
- Site
- This will automatically populate from the site you logged in under. This can be changed to any site in the drop down list.
- Funding Source
- Select from the list of funding sources available for the selected site
- Referral Source
- Select from the list of general referral sources
- Incoming Referral
- Where required, you can select a specific organisation or department that provided the initial referral
- Client Attendance Profile
- DEX specific field – if left blank, the case is considered to be for an ‘individual person’
- External ID
- If required, enter an external ID for cross referencing purposes
- Notes
- Enter any case level notes that need to be available here. This should not contain sensitive session notes.
- Service Status
- Defaults to Open. Can be edited to another option as required.
- Case Plan Developed
- Click the check box if a Case plan has been developed for this case.
- Review Date
- If required, enter a date for the next case review.
- Primary Reason for seeking assistance
- DEX specific field – select the main reason the client is seeking assistance
- Secondary Reason for seeking assistance
- DEX specific field – select any additional reasons the client is seeking assistance.
Tip: Fields with a red asterisk are mandatory.
Step 7. Click Save
The new case is added and now appears in detail view.
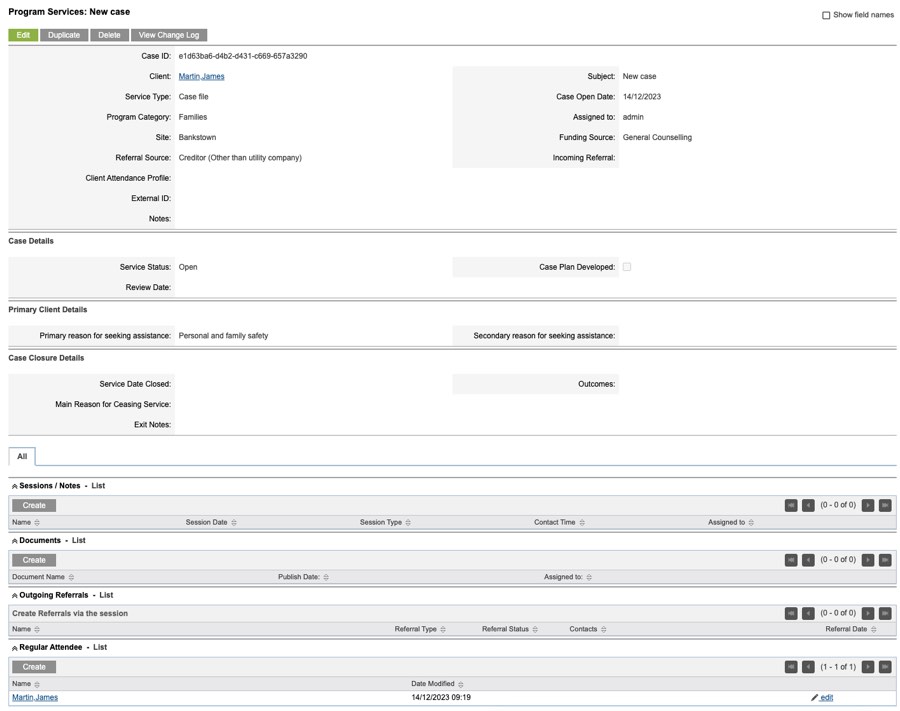
The Additional sub-panels are displayed beneath the case details.
- Sessions/Notes
- Use the Create button to record sessions/notes for the case
- Documents
- Use the create button to attach documents/files to the case
- Outgoing Referrals
- Outgoing referrals are recorded against a session/note, but will be displayed here.
- Regular Attendees
- Shows a list of clients linked to the case. In most cases there will be a single client listed.
Further Information
For further information, refer to the following articles: