The Emergency Relief record contains information relating to an Emergency Relief interaction with a particular client. This record contains general information relating to the session the client attends and the client’s current circumstances. Details of the assistance provided are captured in the assistance records.
Both paid and voluntary staff are able to track all emergency relief provided to clients. Staff are able to record a wide range of emergency assistance types, can manage a wide range of additional data, and record the frequency of individual client services.
Instructions
Step 1. Log into your CRM database (refer to Logging On for further information).
Step 2. Search for the required Client.
If the client you need does not exist in your database, create a new client.
Step 3. Open the Client record
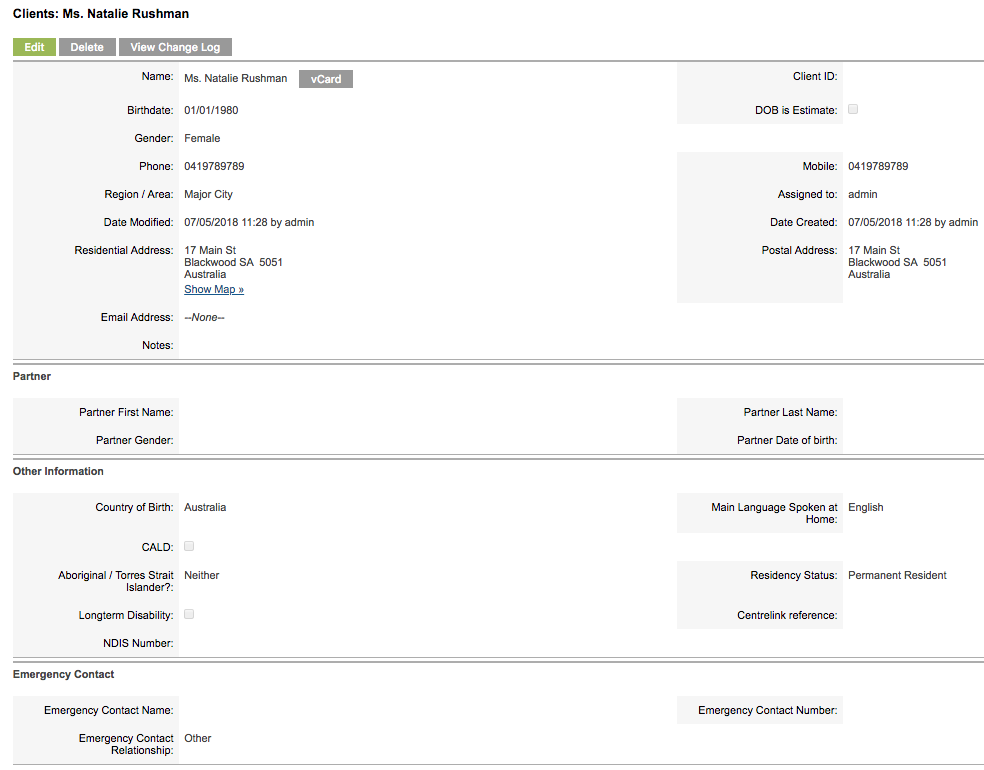
Step 4. Scroll to the Emergency Relief sub-panel

Step 5. Review any previous Emergency Relief records, and view the Emergency Relief Client Summary to view all previous relief provided.
Step 6. If the client is eligible for Assistance, click Create
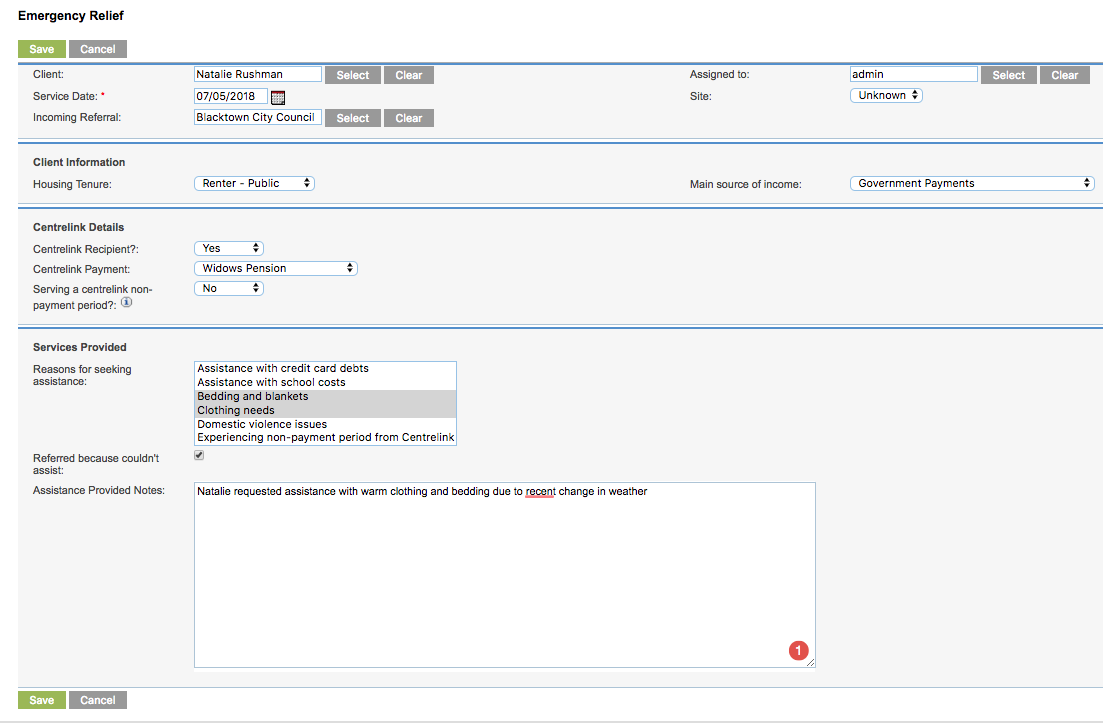
The Emergency Relief page is displayed
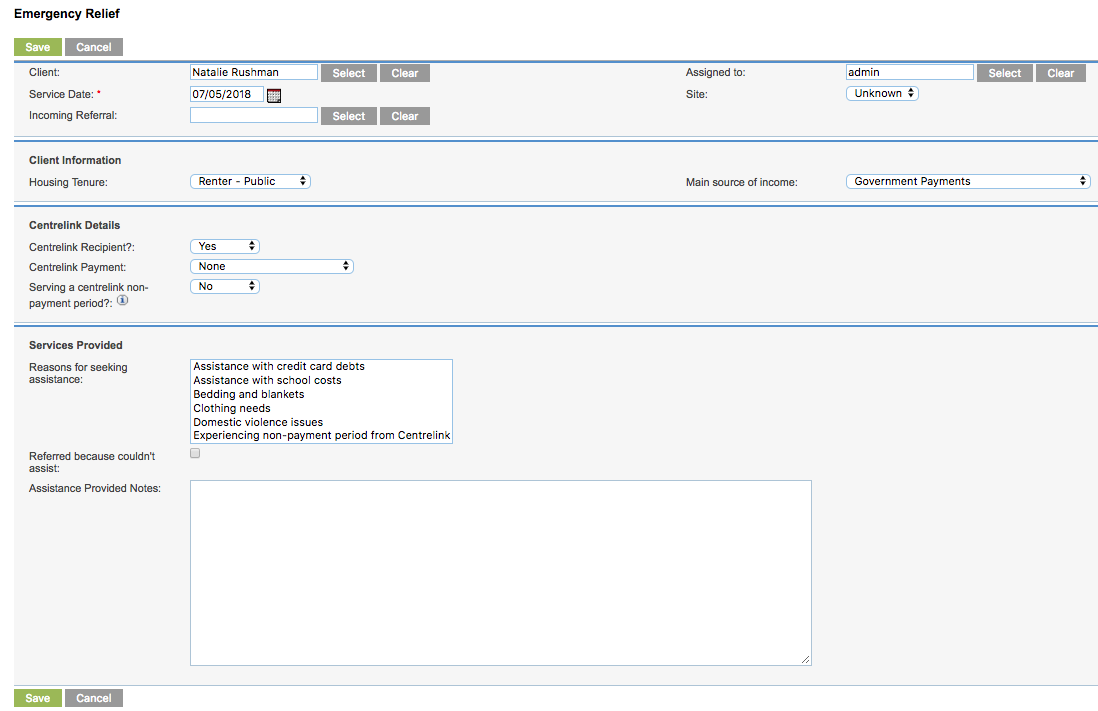
Step 7. Enter the required information
- Client:
- If you found the client first, the client name will automatically appear
- If you created the Emergency Relief record from another page, you may need to select a client.
- Assigned to:
- This field defaults to the current user. if you wish to change the assignee, click select.
- Service Date:
- This field defaults to the current date, you can overwrite the date if recording a past session
- Incoming Referral:
- if required, select the incoming referral contact
- Site:
- This field will default to the current user’s site, but other sites can be selected
- Housing Tenure:
- Select the client’s current housing situation
- Main source of income:
- Select the client’s current main source of income
- Centrelink Recipient?:
- Select whether the client is a centrelink recipient
- Centrelink Payment?:
- Select the sort of Centrelink payment the client receives, or select none
- Service a centrelink non-payment period?:
- Select whether the client has been affected by Centrelink stopping their payments
- Reasons for seeking assistance:
- Select the reason(s) the client is seeking assistance
- Referred because couldn/t assist?
- If the requested assistance could not be provided, click the check box
- Assistance Provided Notes:
- Enter any notes related to the assistance provided.
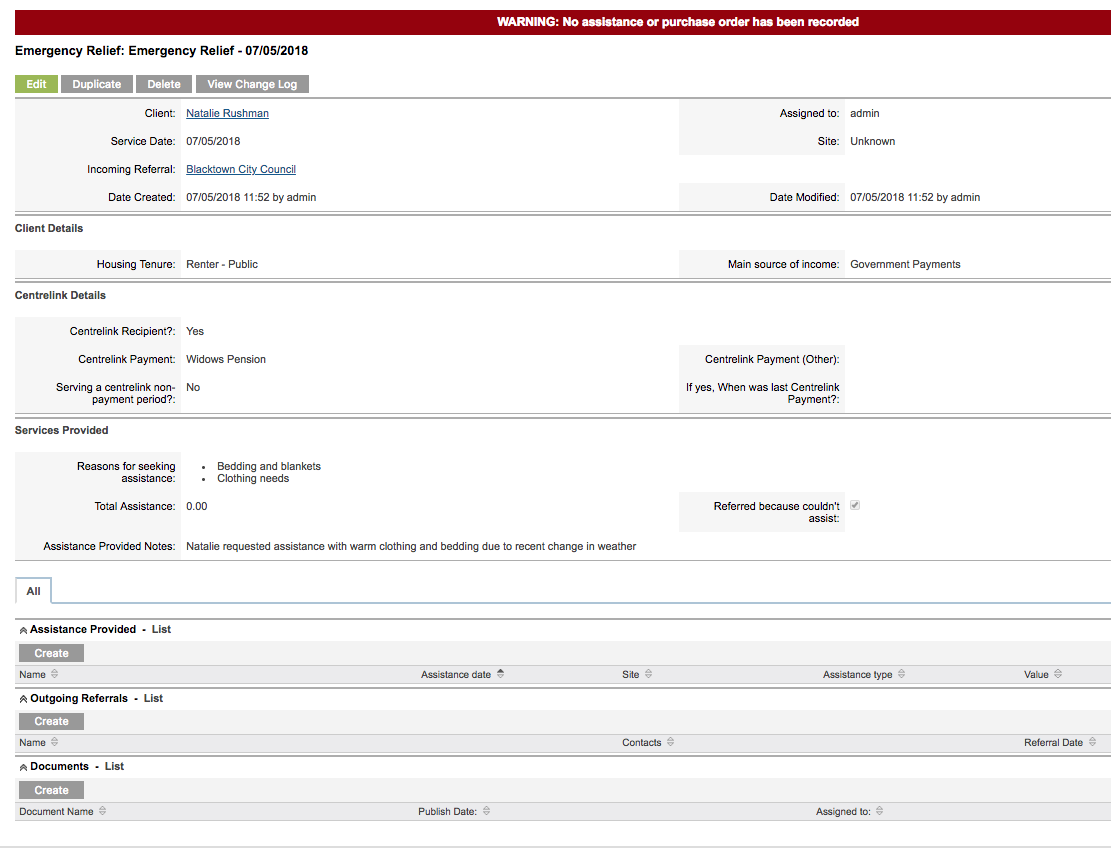
Step 8. Click Save
The Emergency Relief record is created
Next Steps
Further Information
For further information, refer to the following articles: