CHSP Services are recorded against CHSP Cases. Clients may make a contribution towards the cost of these services.
In these cases, you may need to create an invoice for the client.
Note - this article refers to the 2020 version of the CHSP module using invoices.
Instructions
Step 1. Log into your CRM database (refer to Logging On for further information).
Step 2. Before creating an invoice, you should ensure that your Regular Attendee records are correctly configured, and your Services have been delivered.
- <CHSP Service Charges>
Step 3. Once the services have been delivered, the invoice items should be available.
Select Invoice Items from the menu.

Step 4. Use the Search options to return the items to be invoiced.
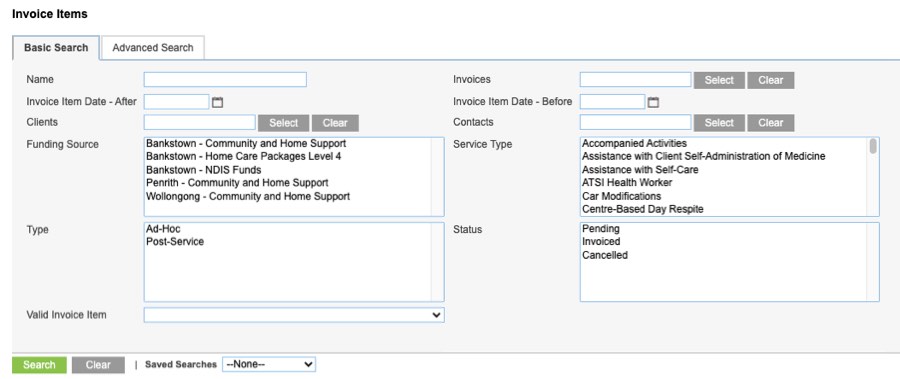
Generally, you would filter on Invoice Item Date – After, Invoice Item Date – Before and Status.
- Invoice Item Date – After
- Select/enter the earliest date you wish to invoice. Generally, the date after the last invoice batch.
- Invoice Item Date – Before
- Select/enter the latest date you wish to invoice. This should not be in the future.
- Status
- Select Pending to only include those items that have not been included in other invoices.
You may choose to filter on the following
- Clients
- If you only want to include items for a particular client, click Select and find the required client record
- Contacts
- If you only want to include items for a particular plan manager, click Select and find the required contact record
- Funding Source
- If you only want to include items for clients with a particular funding source e.g. CHSP, HCP, select the required funding source(s)
- Service Type
- If you only want to include items for a particular service e.g. Garden Maintenance, Social Support, select the required service(s)
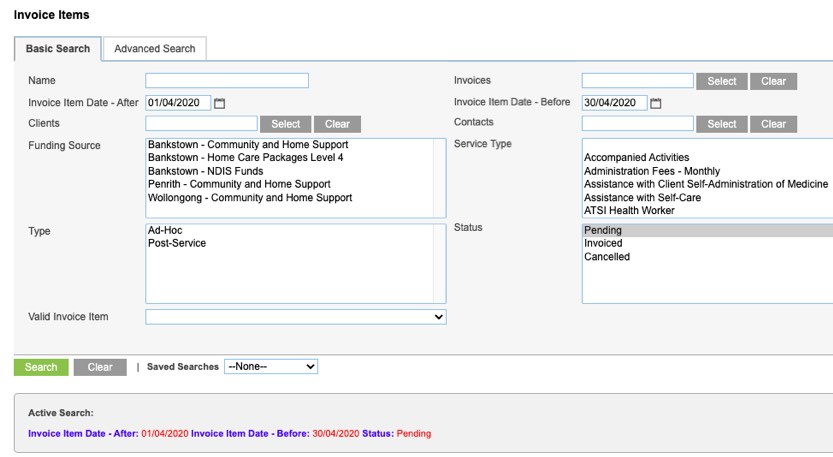
Step 5. Click Search
The invoice items meeting the search criteria are returned.

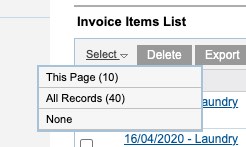
Step 6. Select the items to be invoiced.
You can click the checkboxes for individual items, or click Select and choose This Page (10) or All Records (xx)
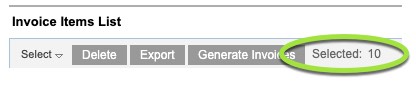
Check that the correct number of items has been selected – this will display just to the right of the Generate Invoices button
Step 7. Click Generate Invoices
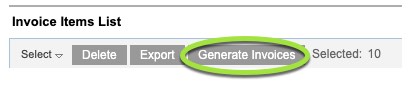
Batch processing complete! will appear at the top of the screen when invoicing is complete.

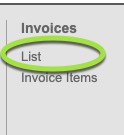
Step 8. To review the created invoice(s), select Invoices from the menu.
All invoices will be displayed.
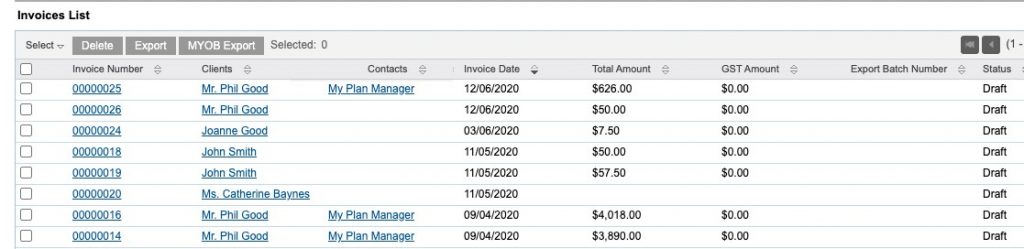
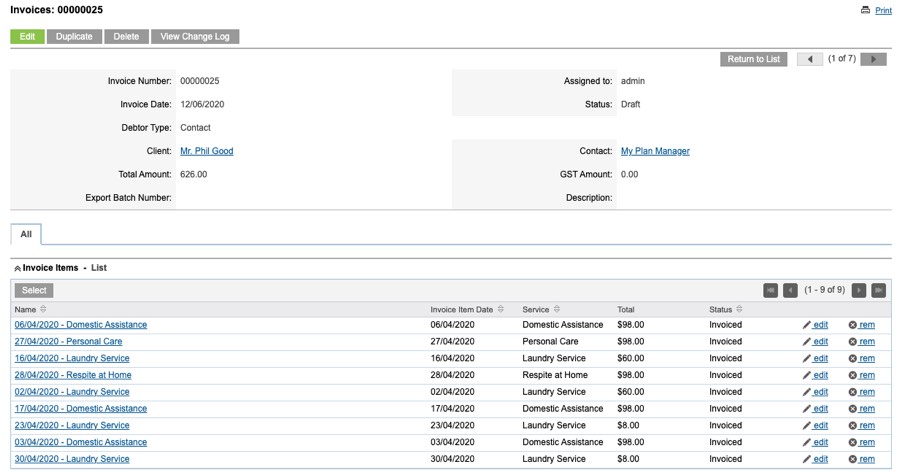
The view the details of an invoice, click the Invoice Number.
Next Steps:
To export the invoice details to a CSV file for your finance system, refer to :
Further Information
If you have an earlier version of the CHSP module, you may need to refer to these articles:
For more information, refer to the following articles:
If you wish to update your CHSP module, please contact your Account Manager, or the Support Team to discuss further.