Invoices are generated once NDIS claims have been approved, or when clients who receive service without an approved NDIA support plan.
Invoice Processing can also create a file to be used with your finance software. Currently, CDS supports exports to MYOB Accounts Right online and Xero. To discuss finance system options, please contact your CDS Account Manager.
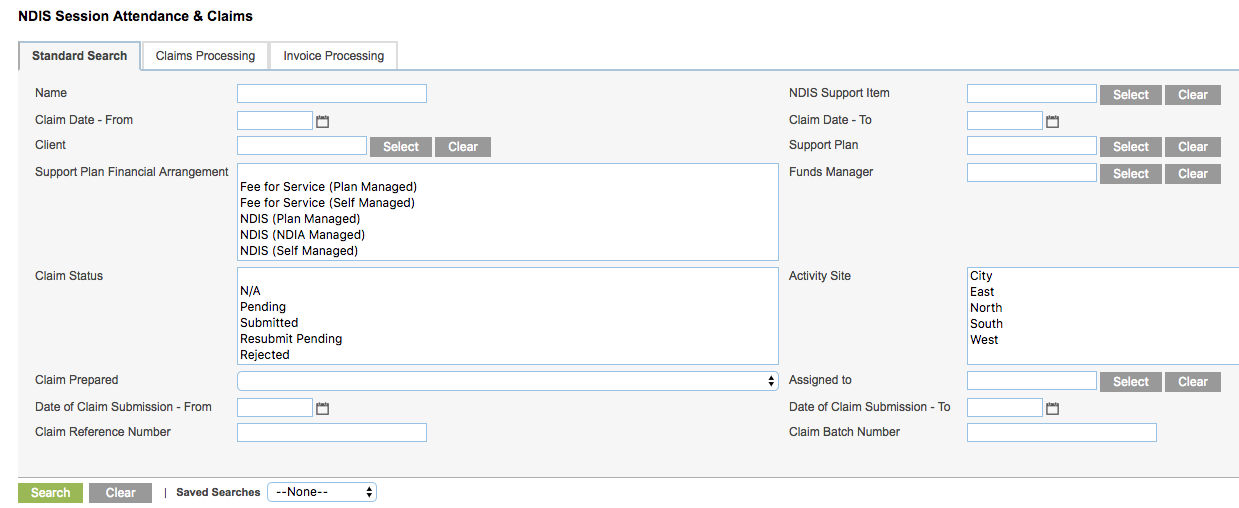
Instructions
Step 1. Log into your CRM database (refer to Logging On for further information).
Step 2. Select Session Attendance & Claims from the top menu
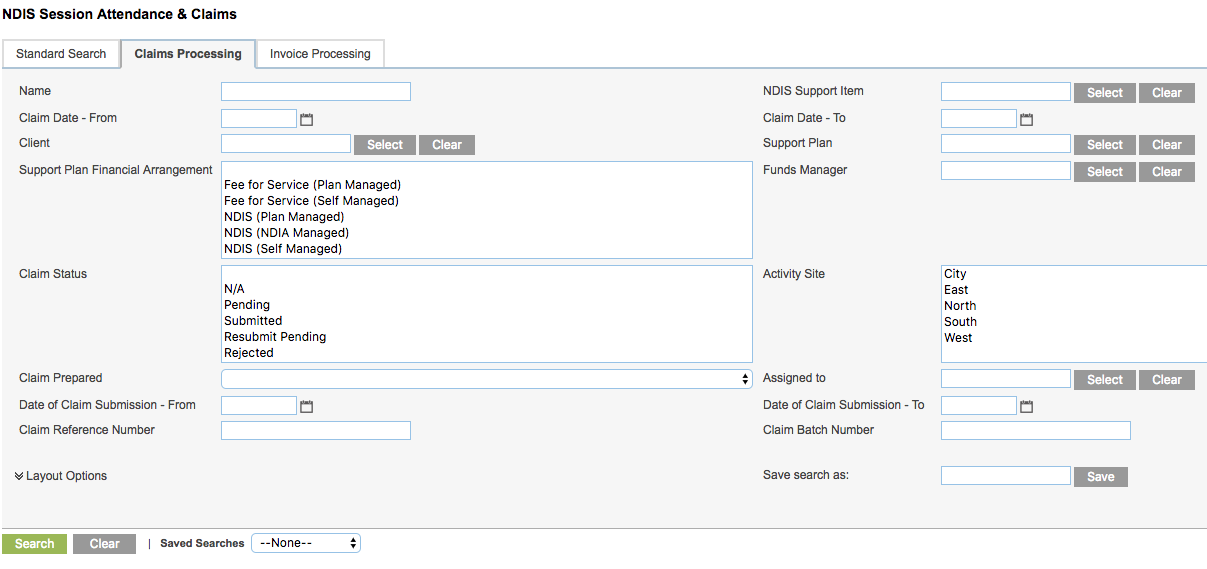
Step 3. Click on the Invoice Processing Tab
Step 4. Enter the required search criteria for the claims to be invoiced.
Date of Claim Submission – From
* Select the start date of the claims to be submitted
Date of Claim Submission – To
* Select the end date of the claims to be submitted
Claim Status
* N/A – to include fee for service clients
* Submitted – to include claims that have been successfully submitted to the NDIA portal
Invoice Status
* Unprocessed – to exclude any claims that have previously had invoices created
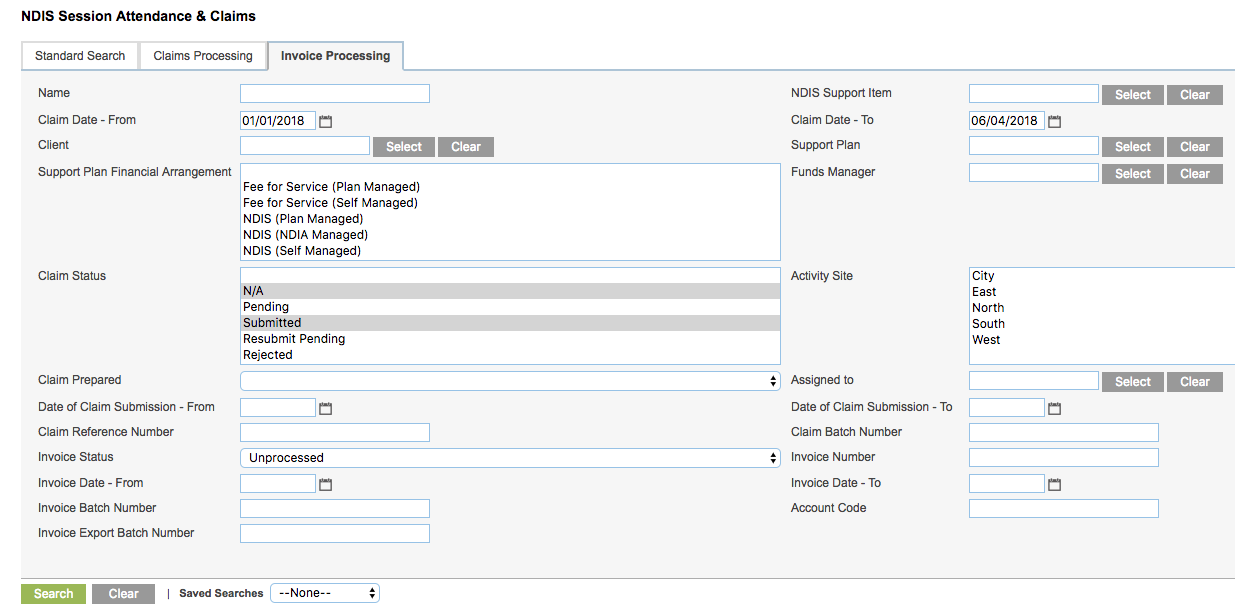
Step 5. Click Search
All claims that meet the entered criteria are returned

Step 6. Check the following:
Total Price – must be greater than 0
If the total price is 0 – check the claim and ensure that the appropriate NDIS Support Item has been selected.
Invoice Debtor Name – must not be blank
If the Debtor name is blank, check that the Client record and Support Plan have the correct NDIS information.
It may be that a Support Person has had a claim raised against their attendance in error.
Step 7. Once the claims have been checked, select the claims to submit.
You can click the Select dropdown at the top of the list to select all records, or all for the current page.
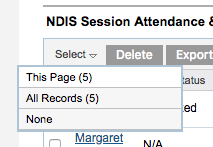
You can also select individual claims by clicking the check-box next to the claim.
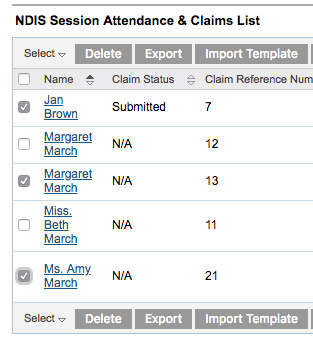
Step 8. Once the required Claims are selected, click Generate Invoices
If any errors exist, the system will generate a file named: Errors_generating_invoices_<date>
Review any errors and resolve them or do not submit the problematic record.
Step 9. Once any errors are resolved or removed, click Generate Invoices.
A confirmation message is displayed at the top of the page.
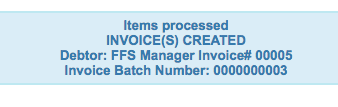
Step 10. To view the invoice details for the claim, copy the invoice batch number from the top of the screen.
Step 11. Click Clear to remove the search criteria from the NDIS Session Attendance and Claims page
Step 12. Copy the Invoice Batch Number into the Invoice Batch Number field.
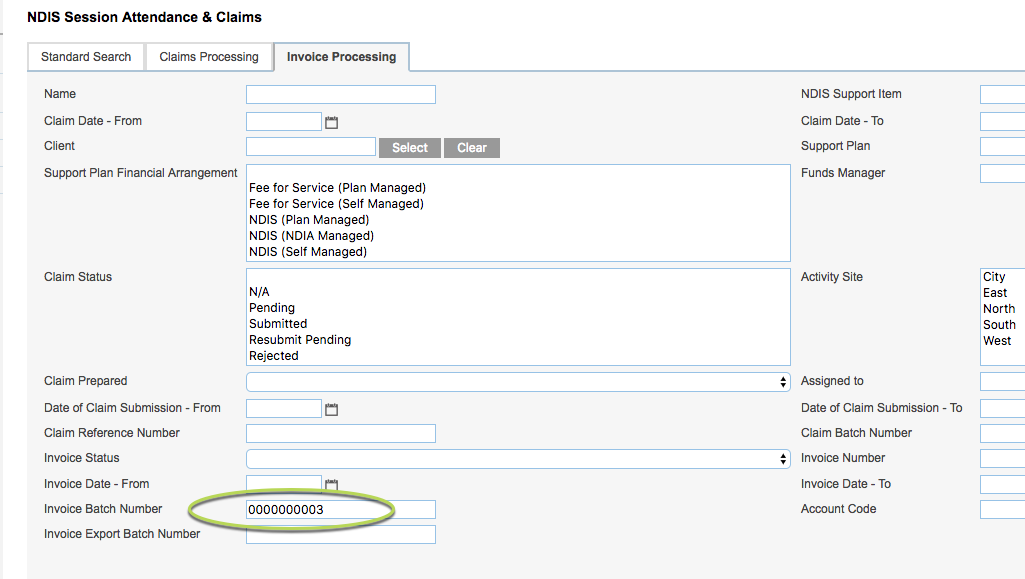
All claims related to that invoice batch number are returned

Next Steps
Export Invoice data for Finance System
Further Instructions
For further information, refer to the following articles: