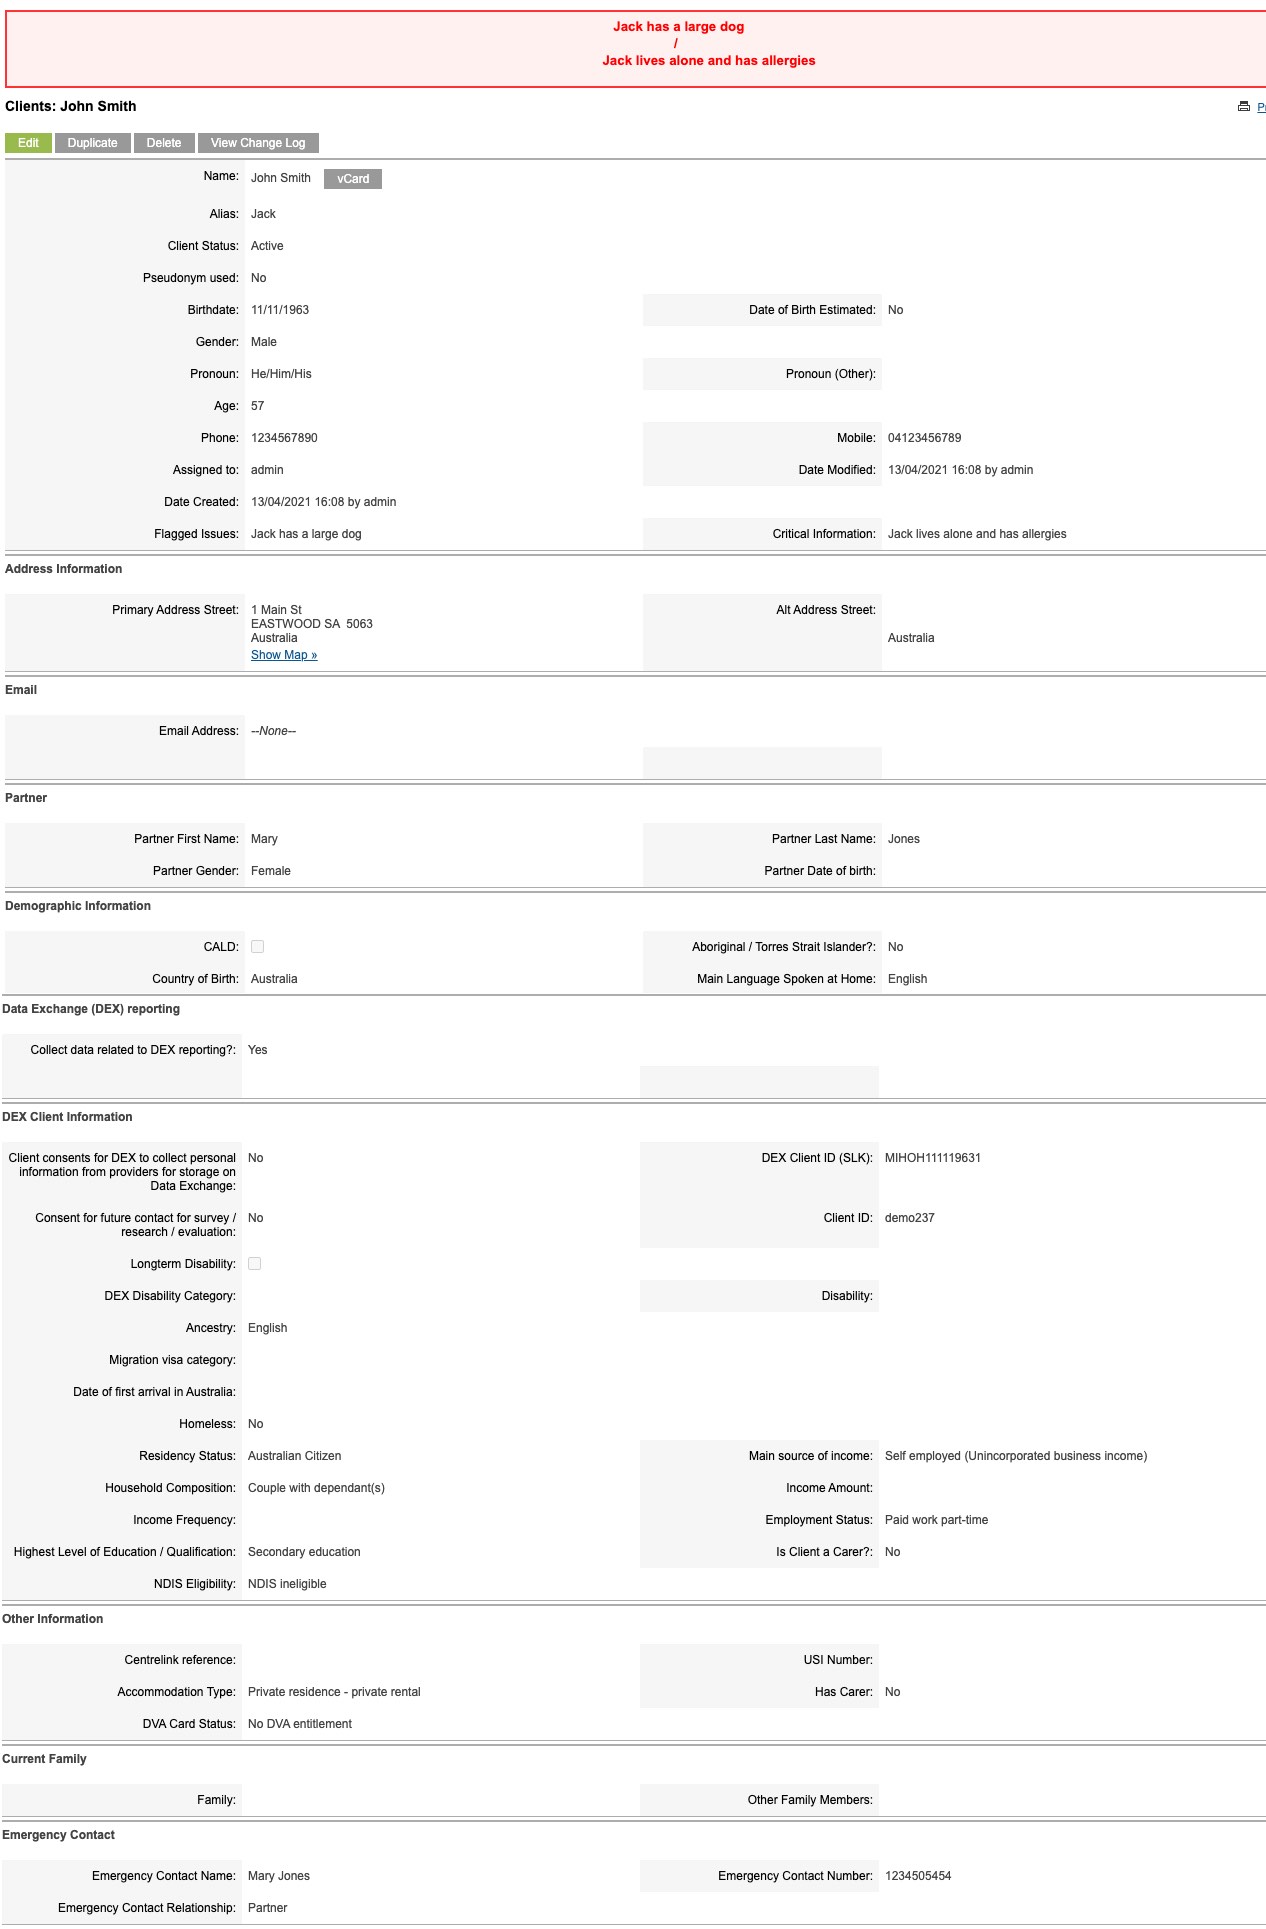
The Client record contains all information for a particular client. This includes personal information and a history of interactions with the organisation.
A Client may benefit from a number of different services, all of which should be recorded against the Client.
It is important to ensure Client records are not duplicated, you should always search for an existing client record before creating a new one.
Instructions
Step 1. Log into your CRM database (refer to Logging On for further information).
Step 2. Search for the required Client.
If the client you need does not exist in your database, continue with the creation of a new client.
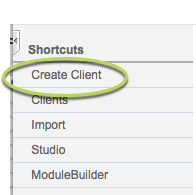
Step 3. Click Create Client in the Shortcuts menu
The Clients page is displayed.
Tip: Each agency may have different data requirements
for a Client record.  While the majority of the
following fields will be present on all systems,
your page may be slightly different.
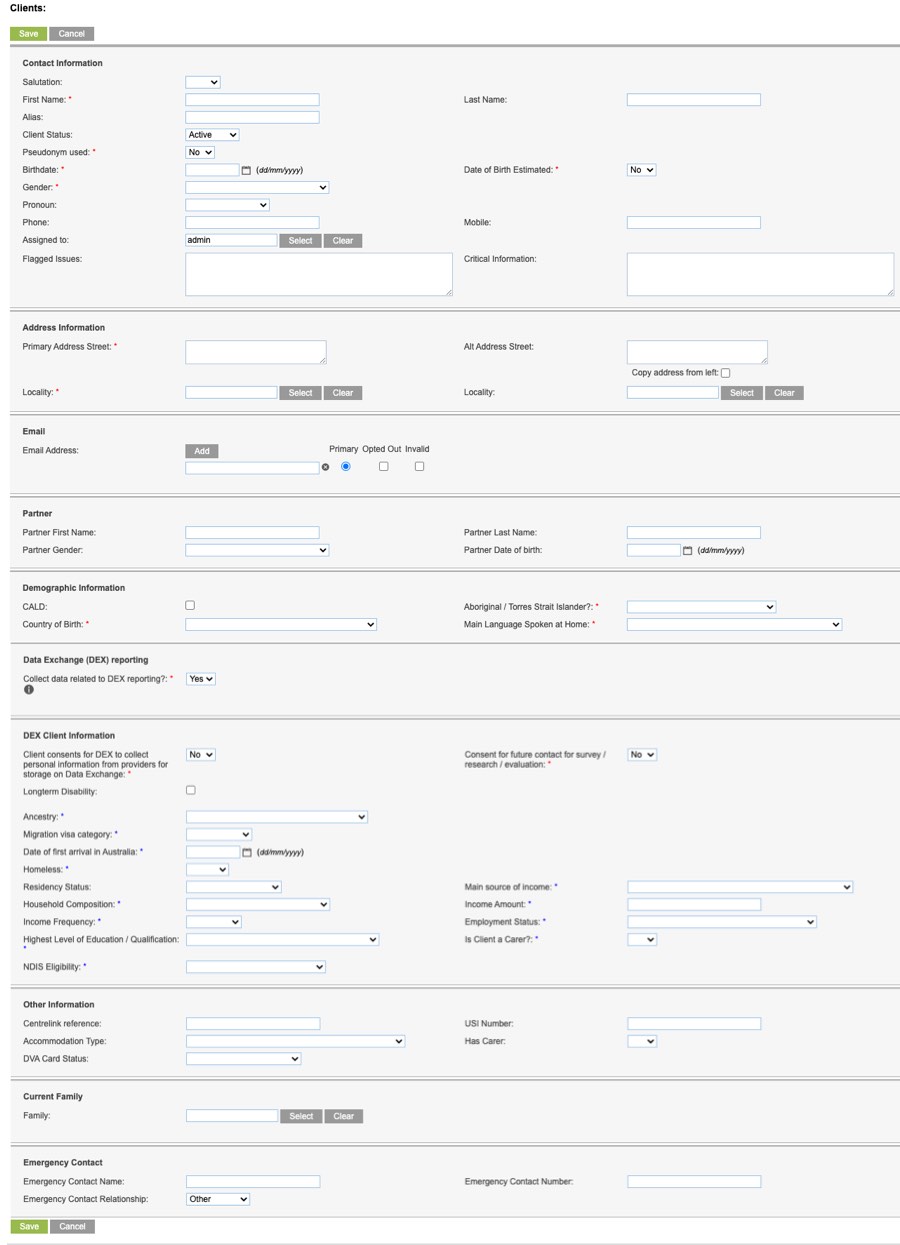
Step 4. Enter the required Client information
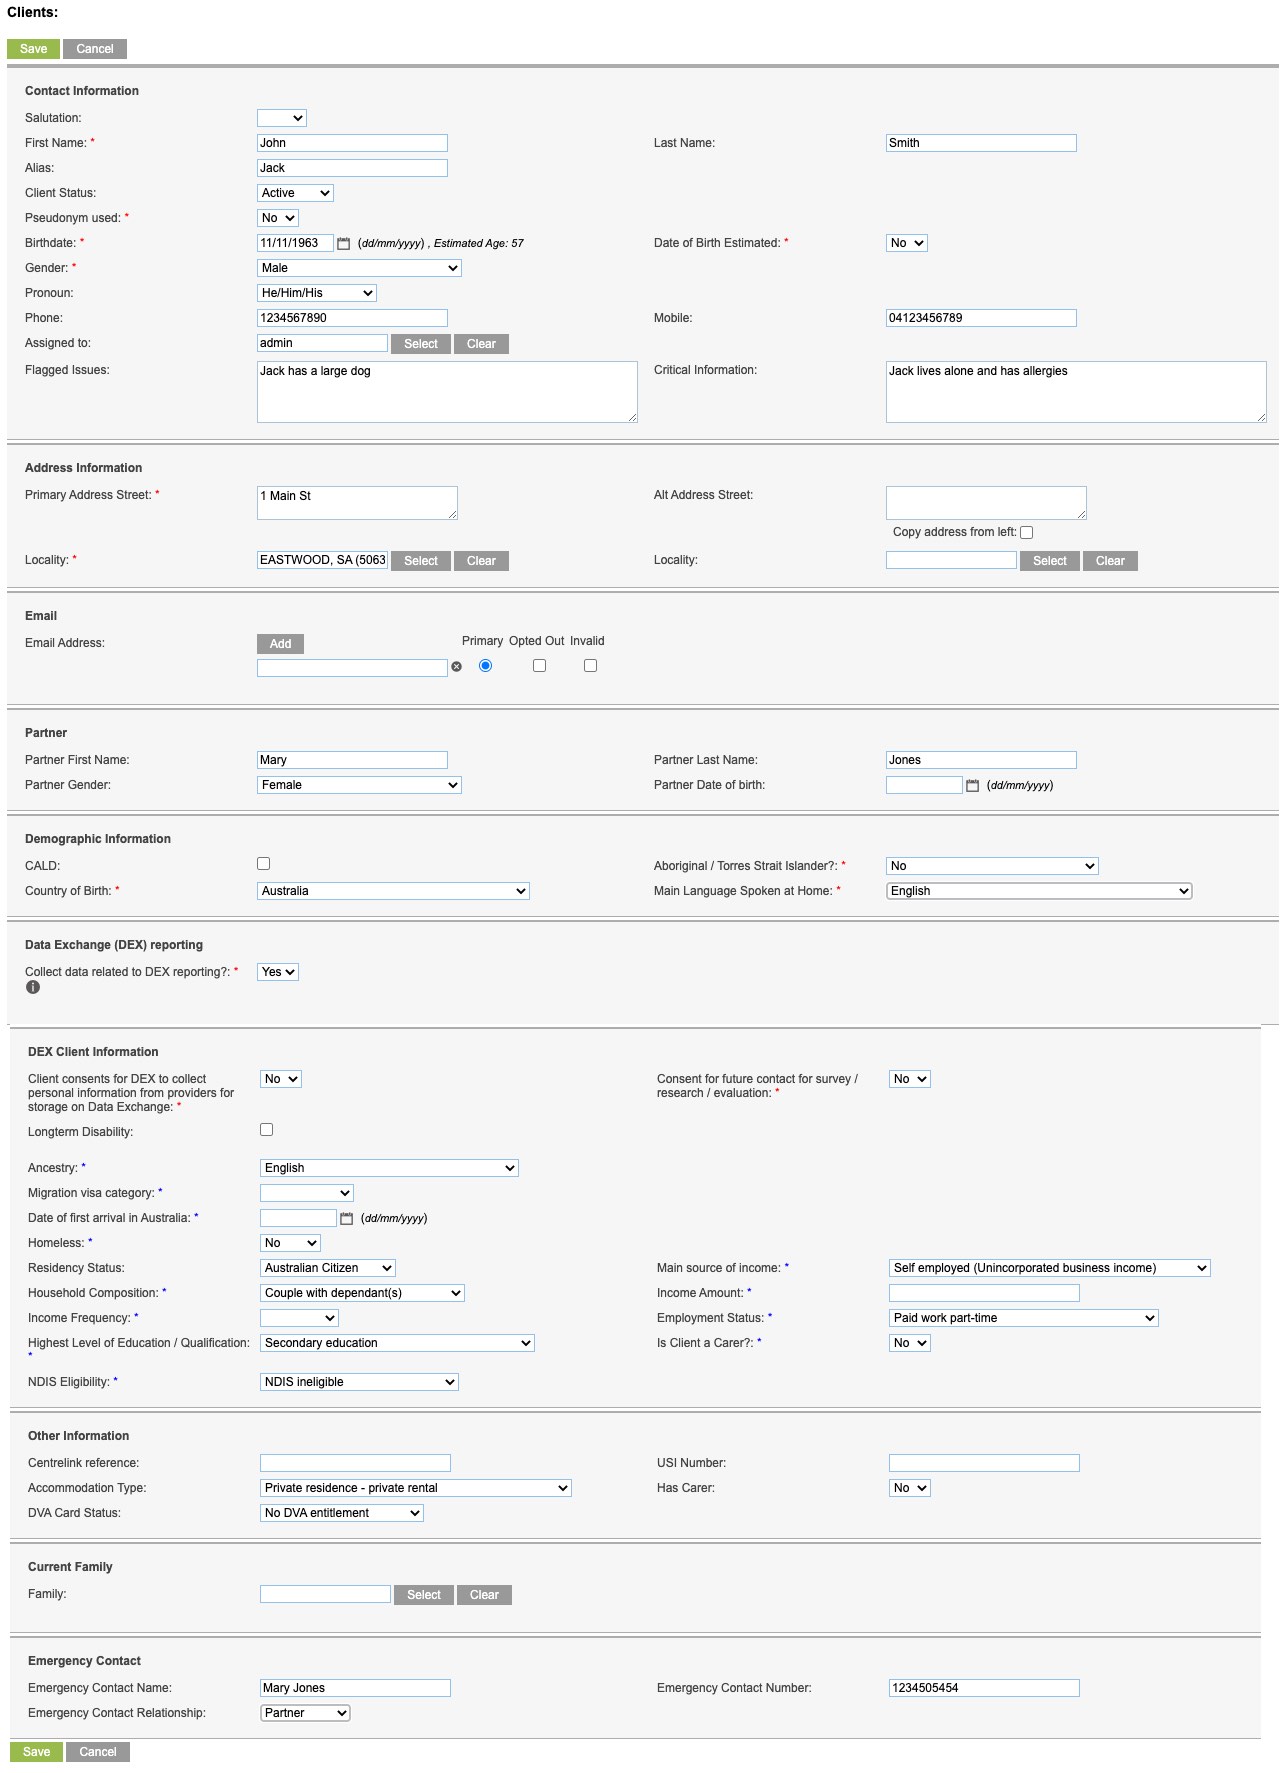
Tip: Fields with a red asterisk are mandatory.
Step 5. Click Save.
If the client’s name is similar to another client in the database, you may receive the following warning:
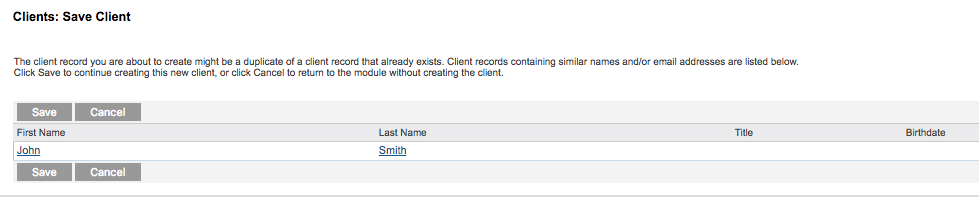
To check the existing record, click Cancel and return to search for the required client.
Step 6. To continue with the creation of the client, click Save.
The Client record is created successfully.
Dependent on the configuration of your database, a number of sub-panels will appear beneath the new client record.
These may include (but are not limited to):
Records created from one of these sub-panels will automatically link to the Client.
Further Information
For further information, refer to the following articles: