As part of your engagement with clients, there are documents, forms or other files you may need to request from them.
When receiving files electronically, security is an important concern.
The secure file transfer functionality allows you to send or request a file from a customer from within the database. The interaction and the file are then linked to the client record.
Instructions
Please review the following video in conjunction with the instructions below.
Step 1. Log into your CRM database (refer to Logging On for further information).
Step 2. Select Clients from the top menu
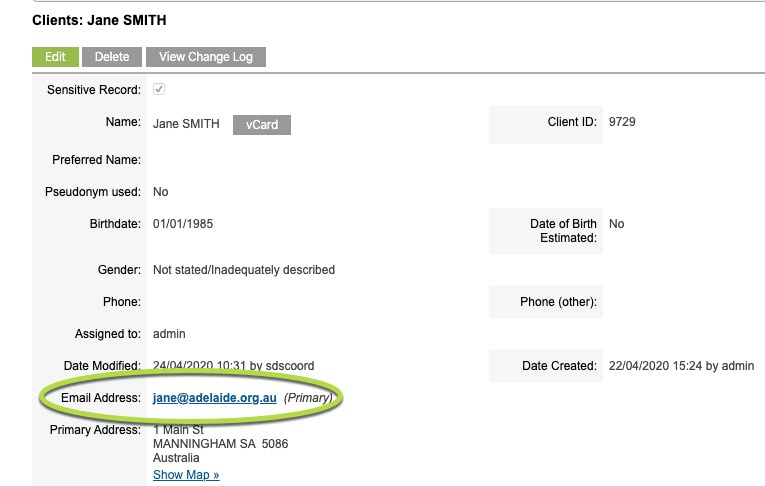
Step 3. Find the Client you wish to send a file to. Refer to Search for a client for further information.
Check that the Client has a valid email address.
Step 4. Scroll to the Secure File Transfer sub-panel

Step 5. Click Create
The Secure File Transfer page is displayed

Step 6. Enter a brief summary in the Transfer Subject field.

This will appear in the email sent to the Client.
Step 7. If required. enter details in the Internal Notes section. This information will not be sent to the Client.

Step 8. Click the check box next to Send a File and Request a File.
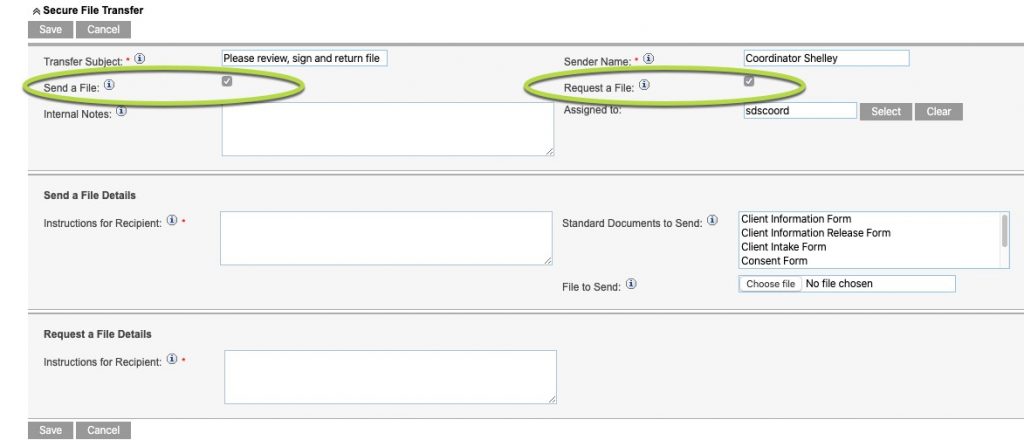
The Send a File Details and Request a File Details sections are displayed.
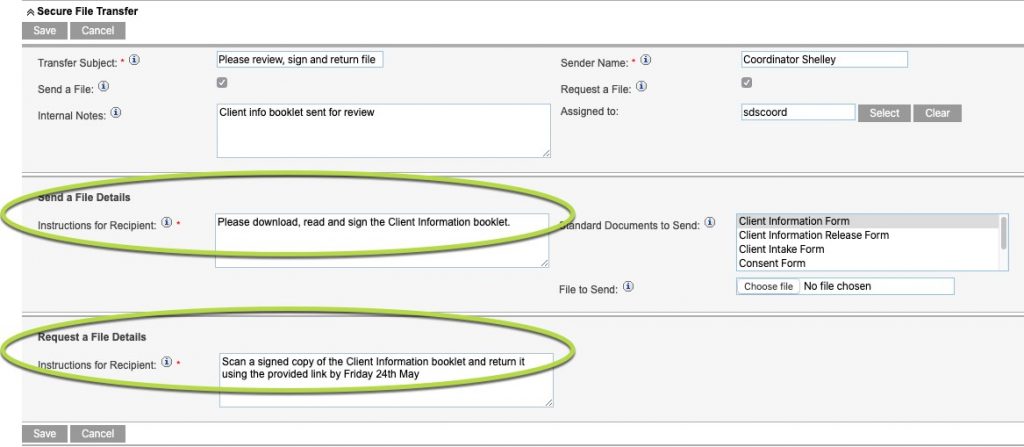
Step 9. Enter details in the Instructions for Recipient fields
This information will be included in the emails sent to the client.
Remember to include any actions the client must take.
e.g. Please download, read and sign the Client Information booklet .
Scan a signed copy of the Client Information Booklet and return it using the provided link by Friday 24th May
Note – Separate emails will be sent to the client for the file download and the file upload. Ensure you enter instructions in the correct field.
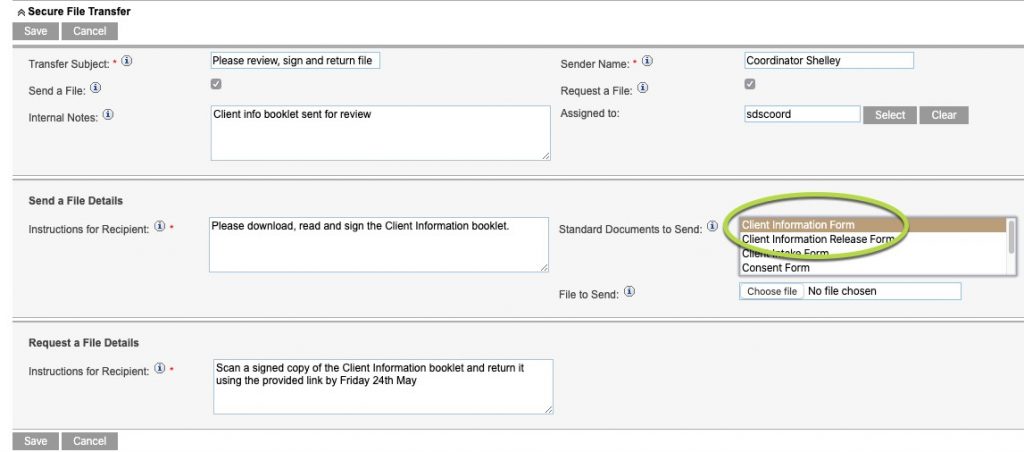
Step 10. Select any Standard Documents.
If your agency has uploaded any Standard documents, you can select them from the Standard Documents to Send list.
Step 11. Click Choose File next the File to Send
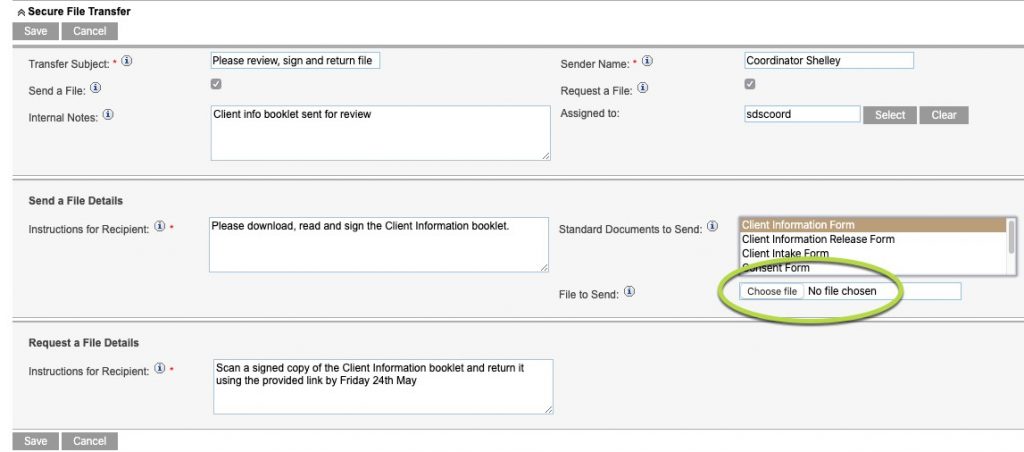
A window will appear, providing access to your PC.
Find the file you wish to send and click Open, or double-click on the file.
Tip - If you need to attach more than one file, combine the files into a zip file. You can then attach the zip file.
Step 12. Click Save

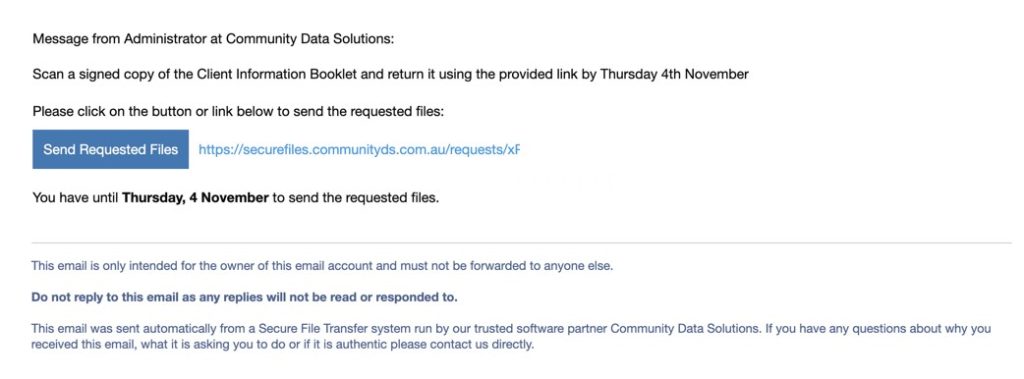
The request is saved, and 3 emails are sent to the client.
- File Transfer – link to the file to download
- File Request – link to upload the completed file
File Download Email:
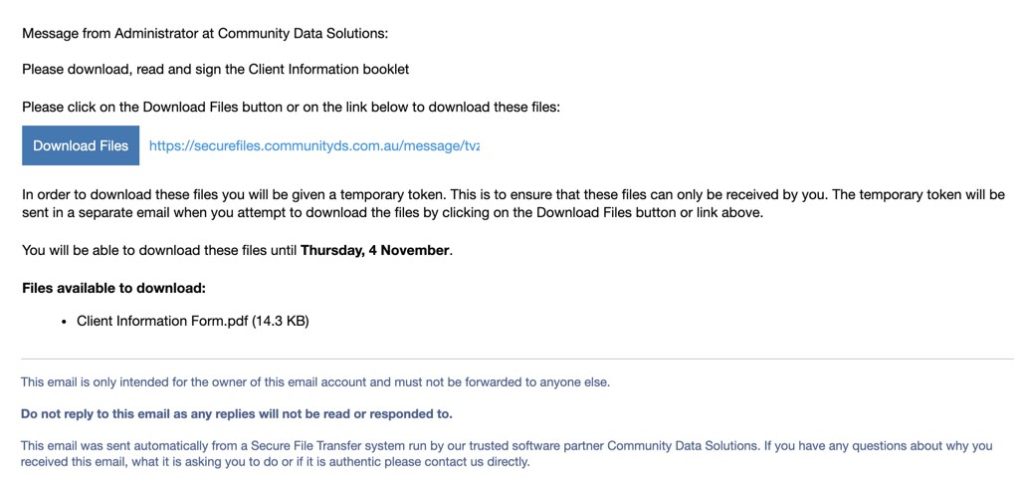
For instructions on downloading the file, please refer to Secure Files Download
File upload email:
If you click on the Transfer Subject in the Secure File Transfer subpanel, you can view the details of the created transfer
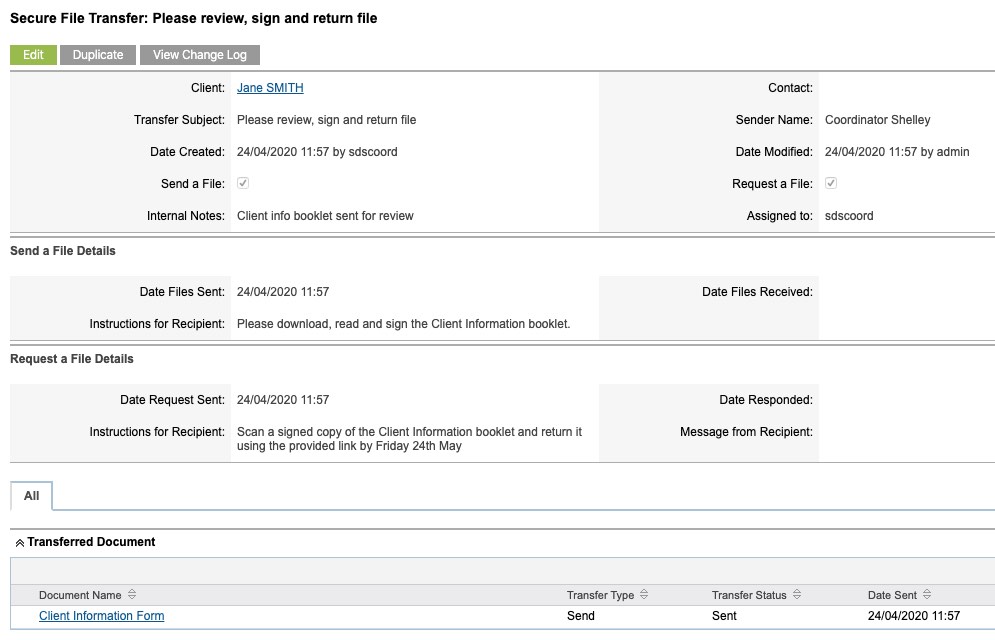
The sent documents appear in the Transferred Document subpanel.
When the client has received the email, the Transfer status will display ‘Waiting for response’
When the client has uploaded the document, it will appear in the Transferred Document subpanel and the Transfer Status will display ‘Requested Files Received’.
When the client has uploaded the document, it will also appear in the Transferred Document subpanel and the assigned user will receive an email advising the file has been received.
Further Information
For further information, refer to the following articles: