The Community Obligations functionality allows for the recording of various programs for adults, young people and volunteers by linking their client/volunteer record, obligation details and related activities within a single case.
The CRM database Community Obligations functionality is tailored to each organisation. Your Community Obligations pages may have a slightly different appearance.
Instructions
Step 1. Log into your CRM database (refer to Logging On for further information).
Step 2. Search the database to ensure the Client record exists. If you are working with Volunteers, you may need to search your Worker or Volunteer module instead.
If the client does not exist in your database, add a client record. If the volunteer or worker does not exist in your database, then add a worker or add a volunteer
Step 3. Scroll down to the Community Obligations sub-panel on the client/volunteer record. Click on the ‘Create’ button.

Step 4. Enter the required Case details
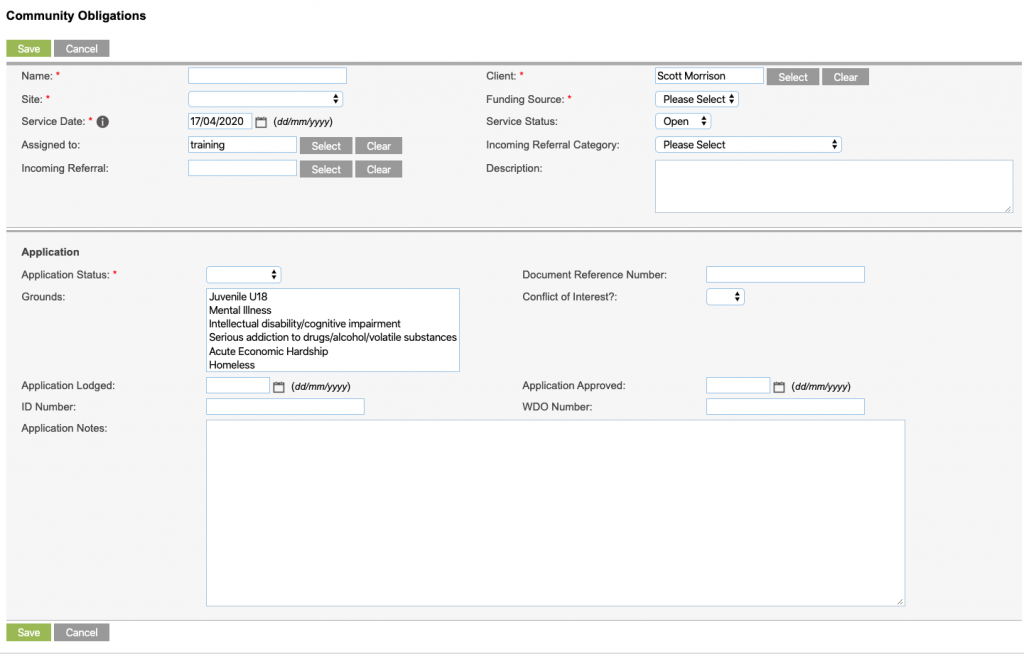
- Name
- Enter a name for the Case e.g. WDO April 2020
- Client (or Volunteer)
- This will be pre-populated.
- Site
- Select the appropriate administrative Site or Office Location for the case
- Funding Source
- Select the appropriate funding source or program for the case
- Service Date
- Defaults to the current date
- Service Status
- Defaults to Open
- Assigned To
- This defaults to the current user, click Select to search for a different user if required
- Incoming Referral Category
- Select from the drop-down list
- Incoming Referral
- If required, start typing the name of a contact, or click Select to search for an existing contact
- Description
- Enter any relevant comments or background information.
- Application Status
- Select from the dropdown list
- Document Reference Number
- Enter if applicable
- Grounds
- Choose one or more from this multi-select list
- Conflict of Interest
- Indicate whether a conflict of interest exists via the dropdown.
- Application Lodged
- Date field dd/mm/yyyy
- Application Approved
- Date field dd/mm/yyyy
- ID Number
- Enter if applicable
- WDO Number
- Enter if applicable
- Application Notes
- Any relevant notes in regards to the application process or result.
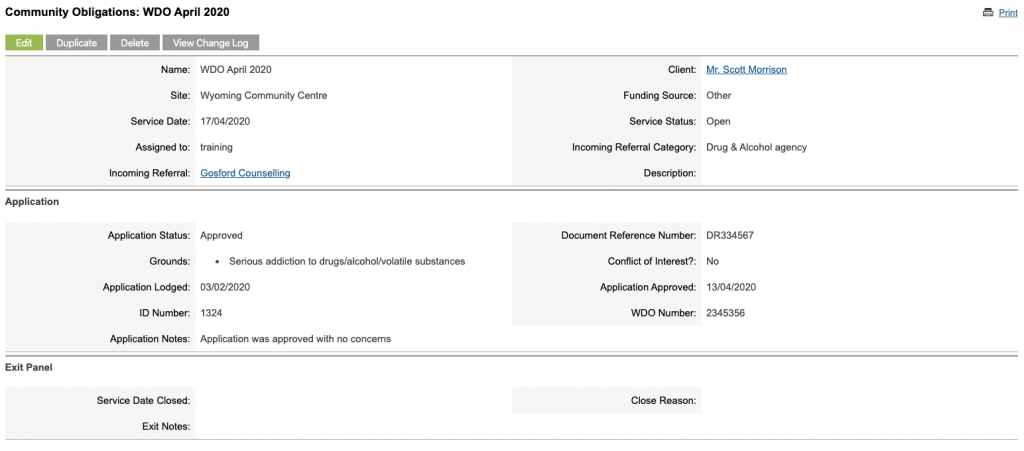
Step 5. Click Save
The Case is saved successfully.
Next Steps
Further information
For further information, refer to the following articles: