Once the data for DEX Clients and activities has been recorded, the DEX Activity Report can be created. DEX requires all data to be uploaded within a set timeframe at the end of each reporting period, but data can be uploaded at any time within the period, once prepared.
Instructions
Step 1. Log into your CRM database (refer to Logging On for further information).
Step 2. Complete the required actions in the DSS Client Compliance Report article.
If you record your SCORE assessments via Community CI – please refer to related article ‘Create a DEX Activity Report – SCORE via Community CI‘
If you record your SCORE assessments using the assessments module in the database, please continue.
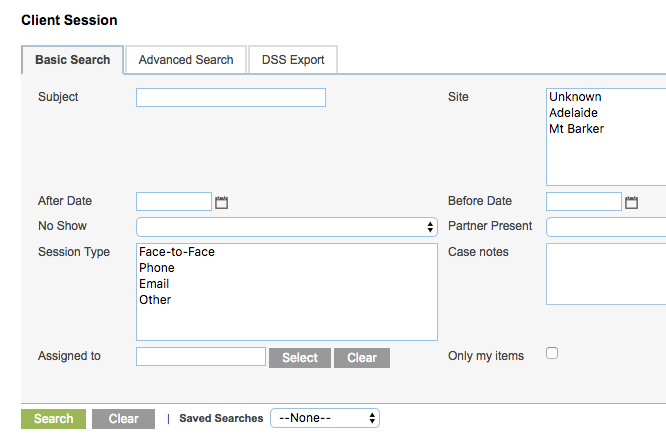
Step 3. Navigate to the required DEX Reporting page e.g. Financial Counselling Client Session
Tip:
On the top menu Hover over Activities and select from the "DSS Reporting" or "DEX Reporting".
These are both the same thing just may be worded differently of your database
Step 4. Click on the DSS Export Tab
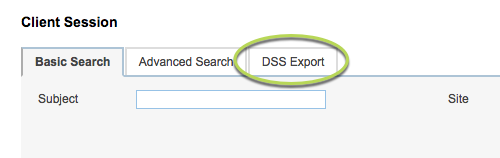
The DSS Export search tab is displayed
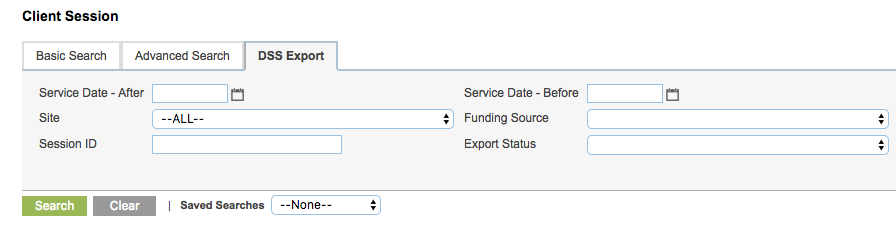
Step 5. Enter the required parameters for your reporting
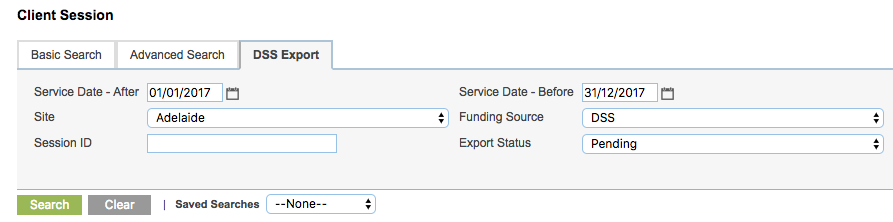
- Service Date – After
- Enter/Select the Start Date of the reporting period
- Service Date – Before
- Enter/Select the End Date of the reporting period
- Site
- If required, select the site you wish to report on. Leave blank to include all sites
- Funding Source
- Select the Funding Source you wish to report on, generally DSS.
- Session ID
- If searching for a particular session, enter the ID
- Export Status
- If some sessions have previously been reported for this period, you may wish to select only those with Pending status
Step 6. Click Search
All matching sessions for your entered parameters are returned
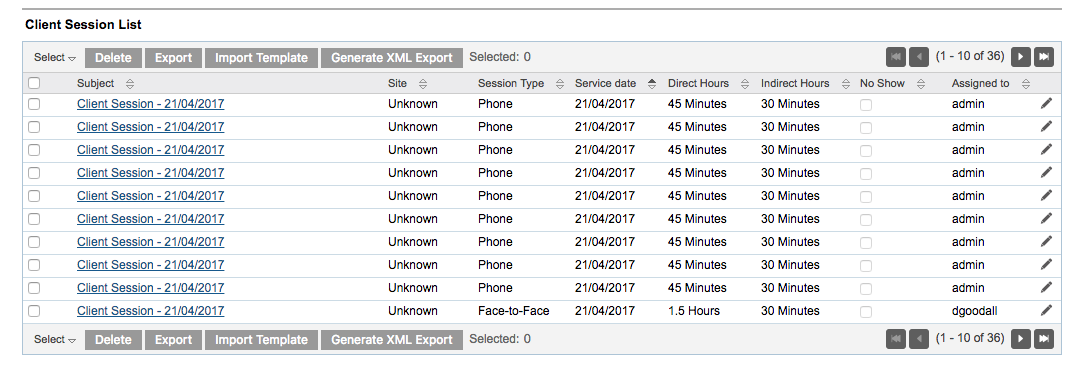
Step 7. Select the sessions you wish to report
You can click the Select drop-down at the top of the list to select All Records or all for the current page (This Page).
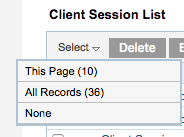
You can also select individual sessions by clicking the check-box next to the session.
Step 8. Click the Generate XML Export button

The XML file is created.
A message appears at the top of the page with a link to the file.

Any issues with the file creation are also flagged. Refer to the DEX Activity File – Creation Error article for assistance.
Step 9. Click on the file link to download the file
The Document page is displayed with the following information:
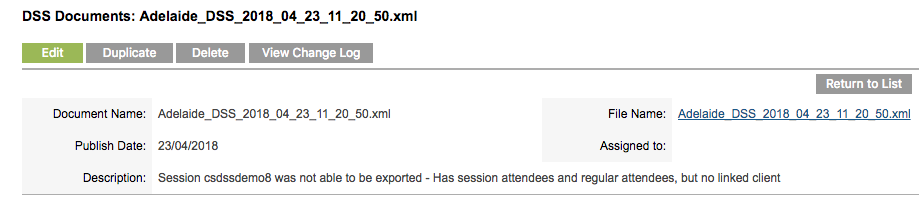
- Document name:
- The name of the document in the system
- File Name:
- Hyperlink to the file itself
- Publish Date:
- The date the document was saved in the database
- Assigned to:
- the person the document is assigned to in the database, may be blank
- Description:
- If there were any errors in the creation of the XML export, they will appear here
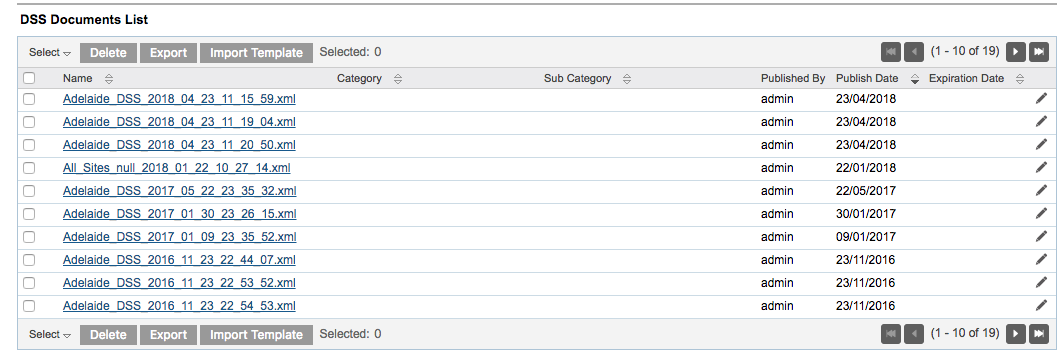
Step 10. To view all DSS Documents, select the DSS Documents page
The DSS Documents list is returned, including all generated XML reports
Next Steps
Resolve any issues with the data – DEX – Portal Report Upload Errors
Upload the file to the DEX Portal – Upload XML Report to DEX
Further Information
For further information, refer to the following articles: