SCORE assessments must always be related to a particular session or activity.
DSS provides 3 individual assessment domains for one-on-one case work:
- Client Circumstances
- Client Goals
- Client Satisfaction
To record a client assessment, navigate to the relevant session and locate the session attendance panel.
Instructions
Step 1. Log into your CRM database (refer to Logging On for further information).
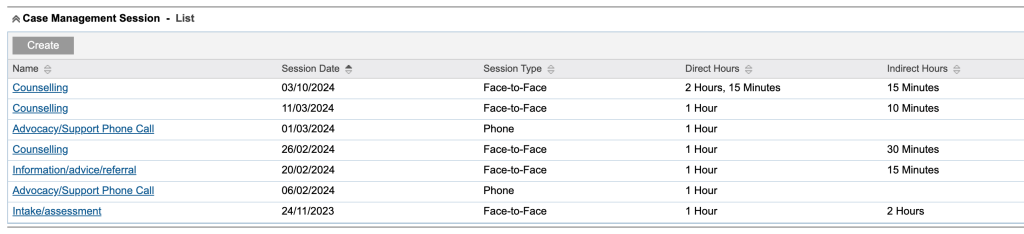
Step 2. Locate the session you wish to assess. This may exist under a variety of sessions e.g. Family Support, Financial Counselling, Settlement Services.
Click on the link to the Session
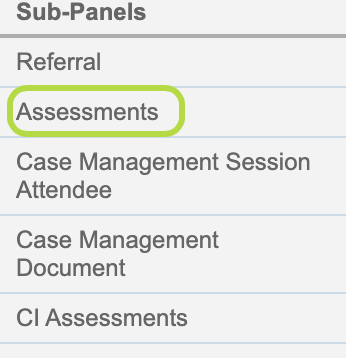
Step 3. Use the Sup-Panel and click on Assessments or Scroll down to Assessments

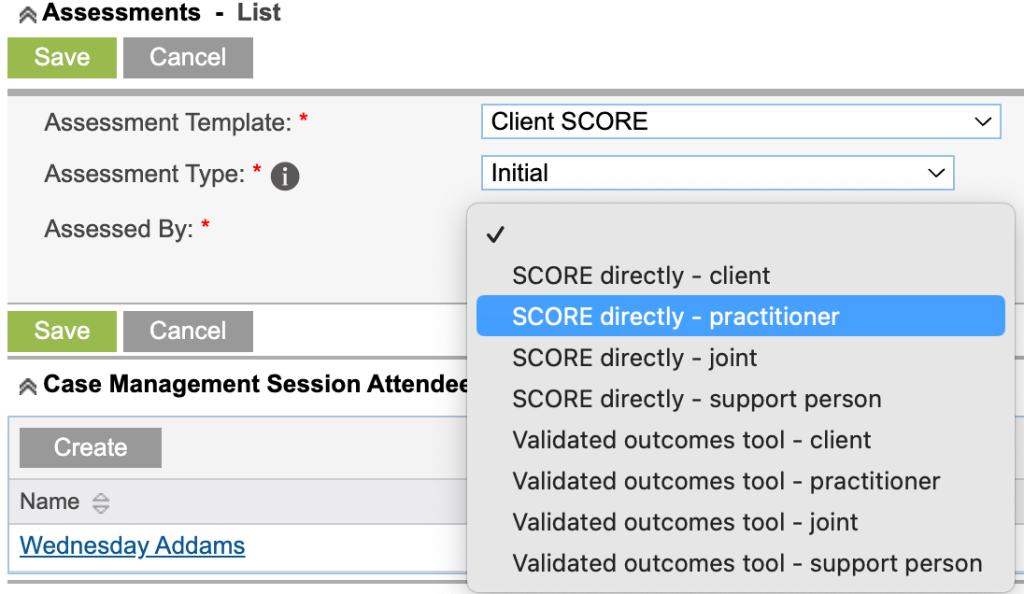
Step 4. Select who the Assessment is for


Then click Create

Step 5. Select the 3 required fields of information
a. Assessment Template
b. Assessment Type
C. Assessed by

Tip:
The screenshots below are an example only.
Select the appropriate options for the Assessment you want to do.
a. Assessment Template
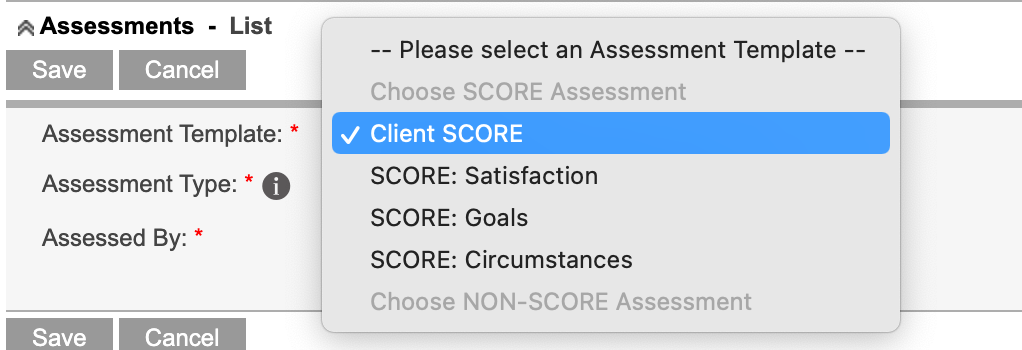
b. Assessment Type
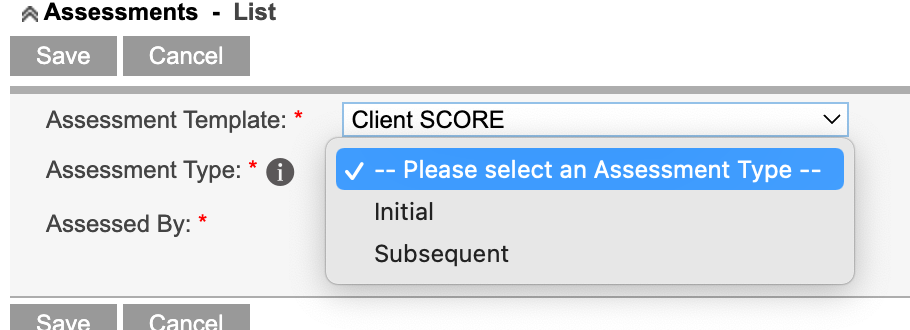
c. Assessed by
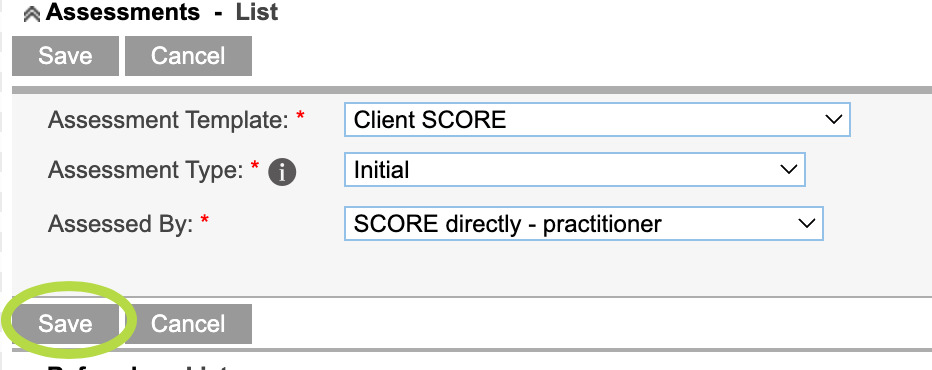
Step 6. Click Save
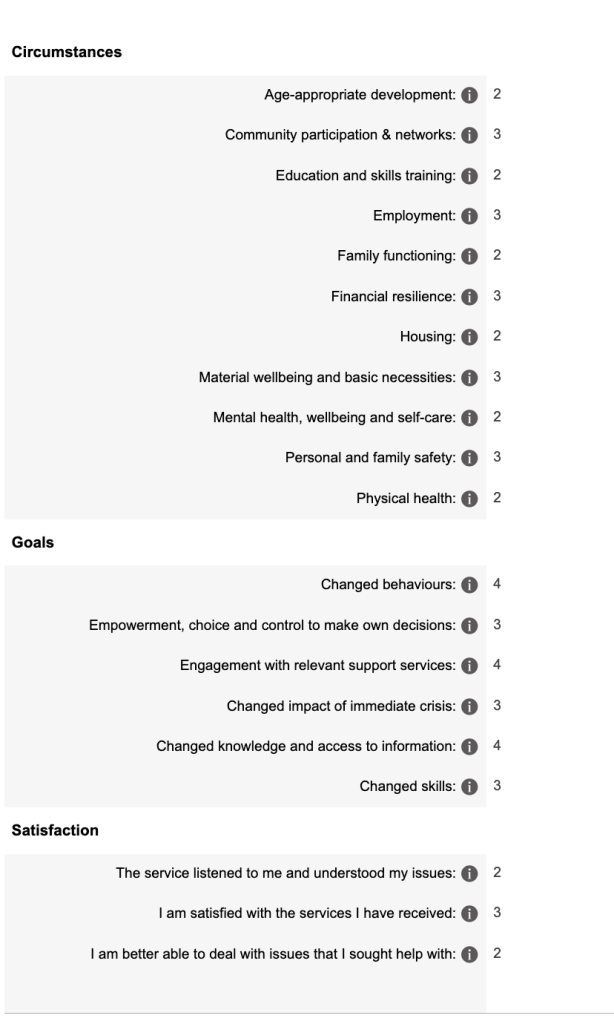
Step 7. The Assessment questions are displayed
Tip:
When recording an Assessment, what you see on your screen will depend on the selections you make.
The following screenshots are based on examples used above and are a guide only.

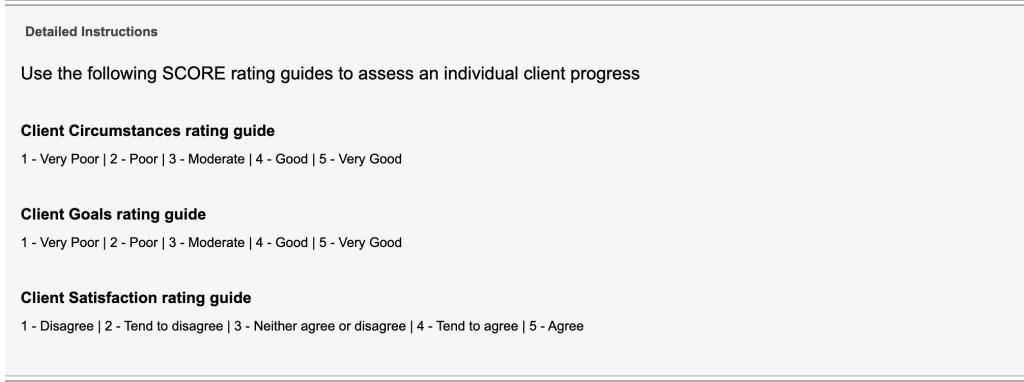
Step 8. Complete the questions as required

Click Save
Step 9. The Assessment record is saved
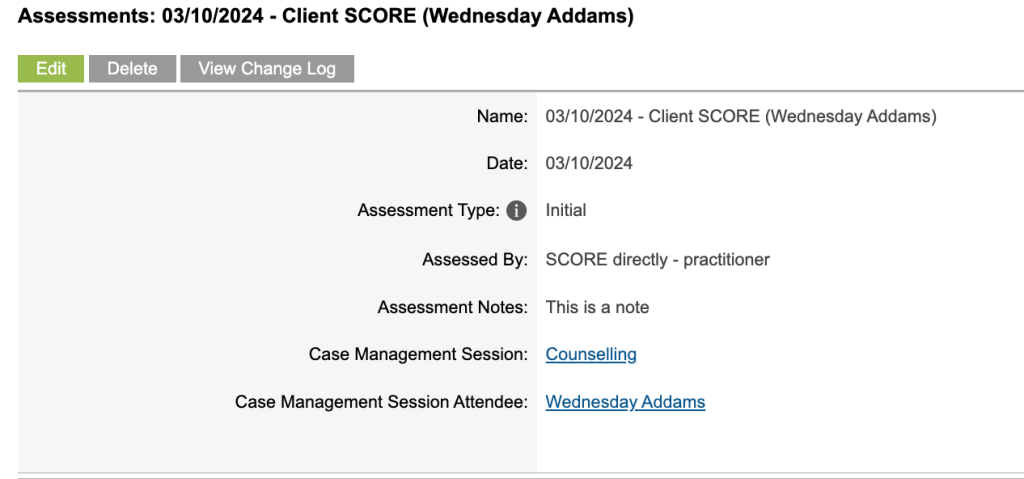
Step 10. Go back to the Session by clicking on the link
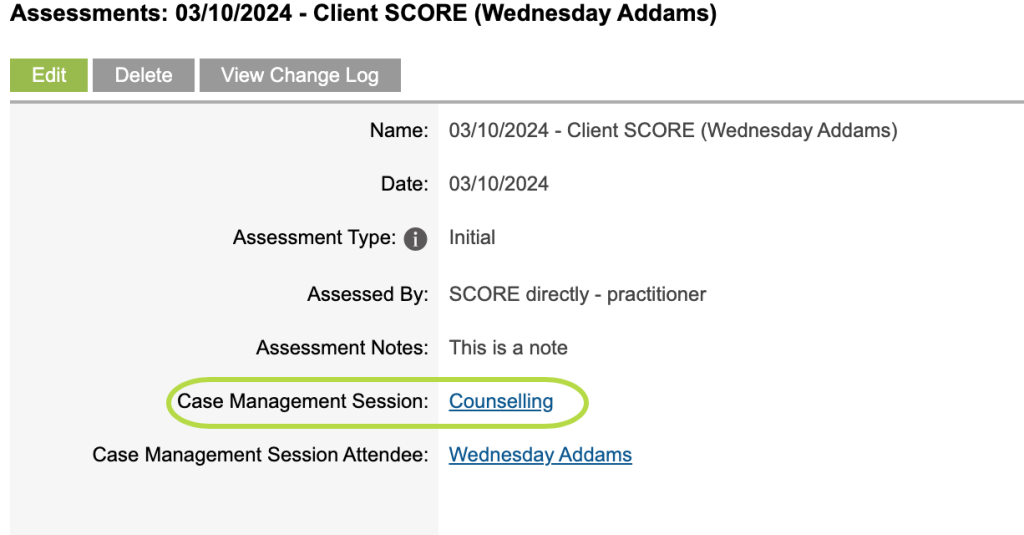
then check that the Status of the Assessment is “Completed”

Tip:
If a Session is in Draft when you upload the DEX reporting file you will get errors.
The Assessment can be in Draft if you have not completed all the questions.
Step 11. Repeat steps 3 – 10 for any additional assessment types for the individual.
These may be for Template/s
- Client SCORE
- SCORE: Satisfaction
- SCORE: Goals
- SCORE: Satisfaction
Tip:
Ensure there is only one assessment of each type.
If multiple assessments of the same type are recorded, your DEX Portal upload will error.
Further Information
For further information, refer to the following articles: