As part of NDIS, your agency will deliver activities to NDIA funded clients and report on these to the NDIA.
Periodically, you will need to submit claims to the NDIA for reimbursement.
It is recommended to send claims through on a weekly basis.
Instructions
Step 1. Log into your CRM database (refer to Logging On for further information).
Step 2. Select Session Attendance & Claims from the top menu
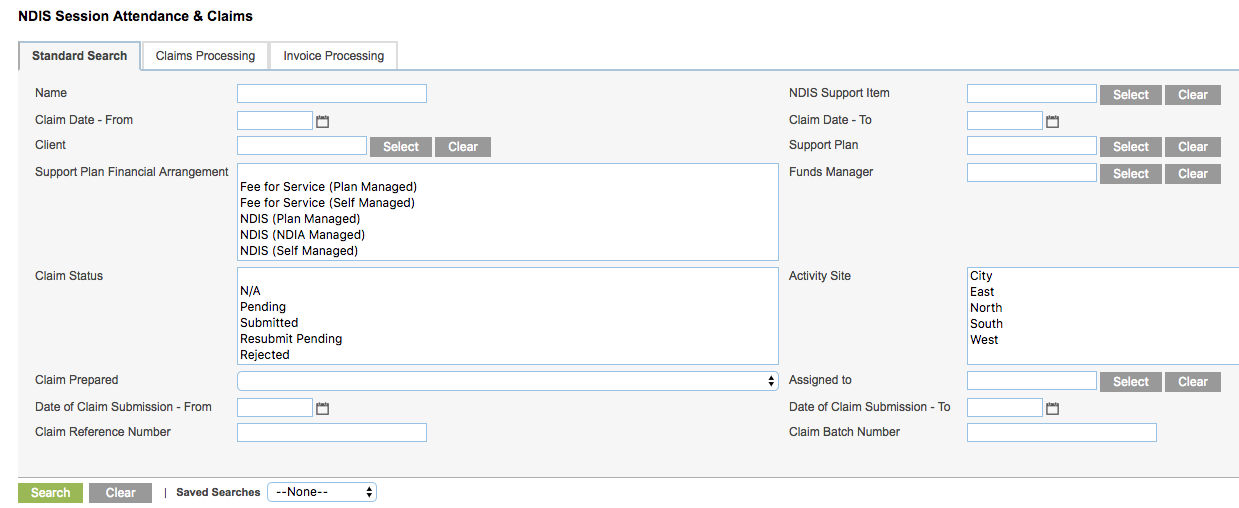
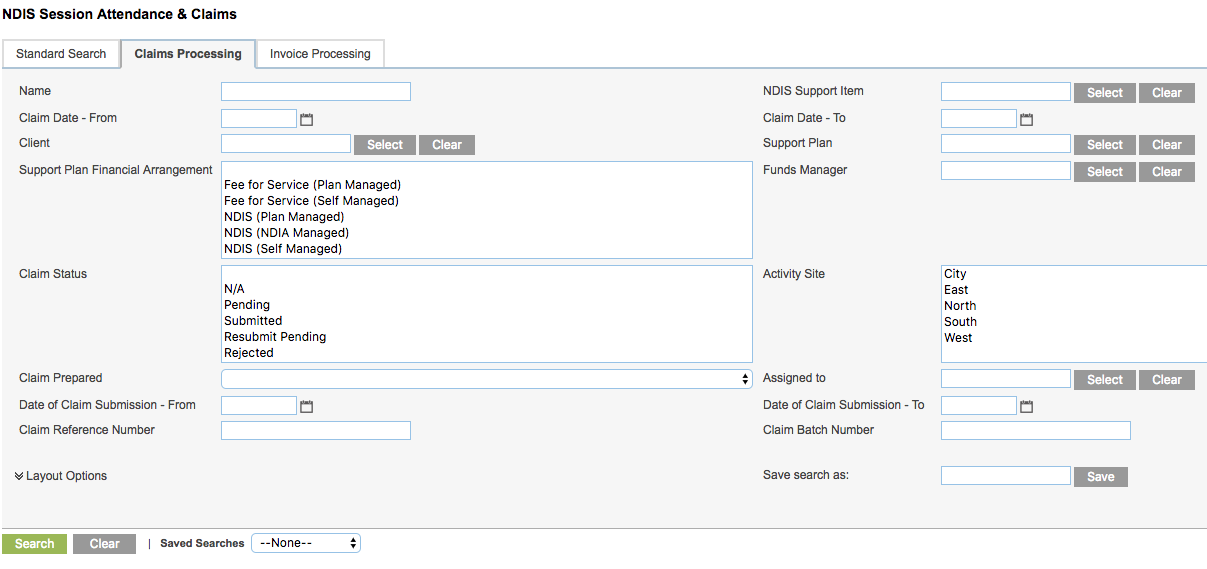
Step 3. Click on the Claims Processing Tab
Step 4. Check for claims with missing information.
Claim Date – From
* Select the start date of the claims to be submitted
Claim Date – To
* Select the end date of the claims to be submitted. This date should not be in the future.
Support Plan Financial Arrangement
* NDIS (NDIA Managed)
Other arrangements should not be lodged to the NDIA. Refer to the NDIS – Generate Invoices article for further information.
Claim Status
* Pending
* Resubmit Pending
Claim Prepared = N
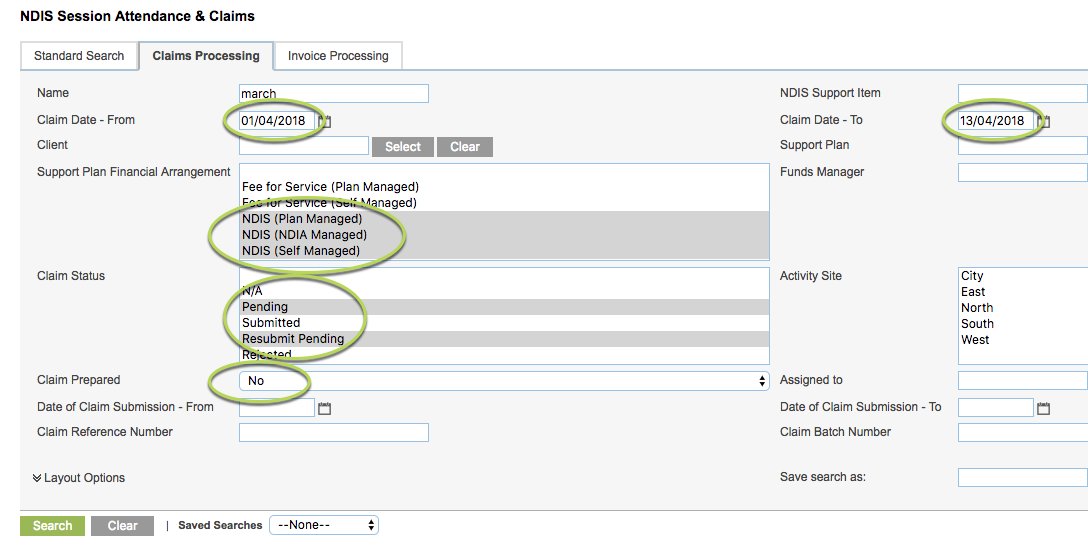
This will return any claims that are due to be submitted, but are missing required data.
- If the total price is 0 – check the claim and ensure that the appropriate NDIS Support Item has been selected.
These claims should be updated prior to creating your Claim Report.
Step 5. Once any problem claims have been updated, run the search again to check that they no longer appear.
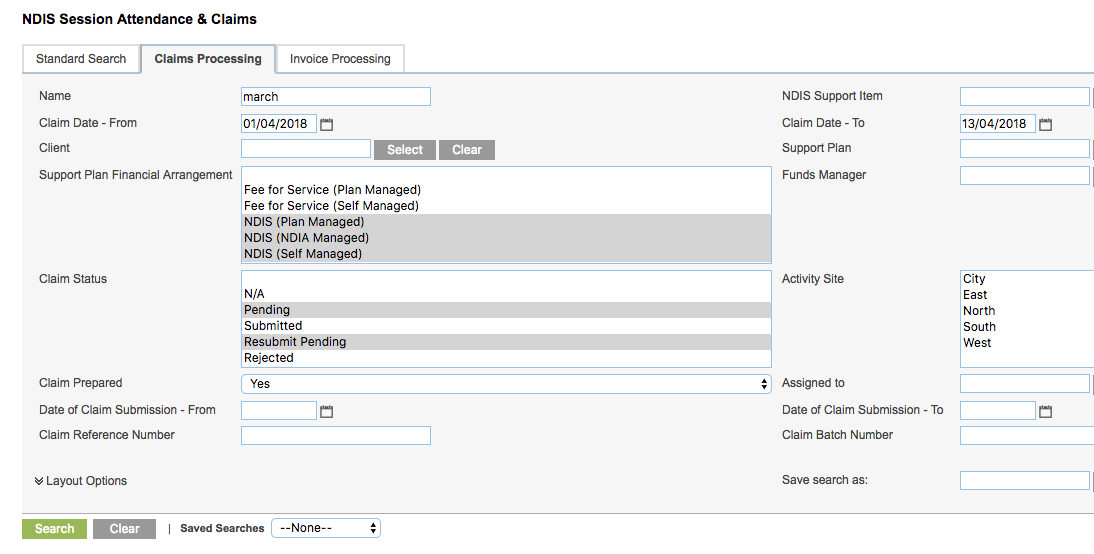
Step 6. Search for claims to be submitted
Claim Date – From
* Select the start date of the claims to be submitted
Claim Date – To
* Select the end date of the claims to be submitted. This date should not be in the future.
Support Plan Financial Arrangement
* NDIS (Plan Managed)
* NDIS (NDIA Managed)
* NDIS (Self Managed)
Other arrangements should not be lodged to the NDIA. Refer to the NDIS – Generate Invoices article for further information.
Claim Status
* Pending
* Resubmit Pending
Claim Prepared = Y
Step 7. Click Search
All claims that meet the entered criteria are returned
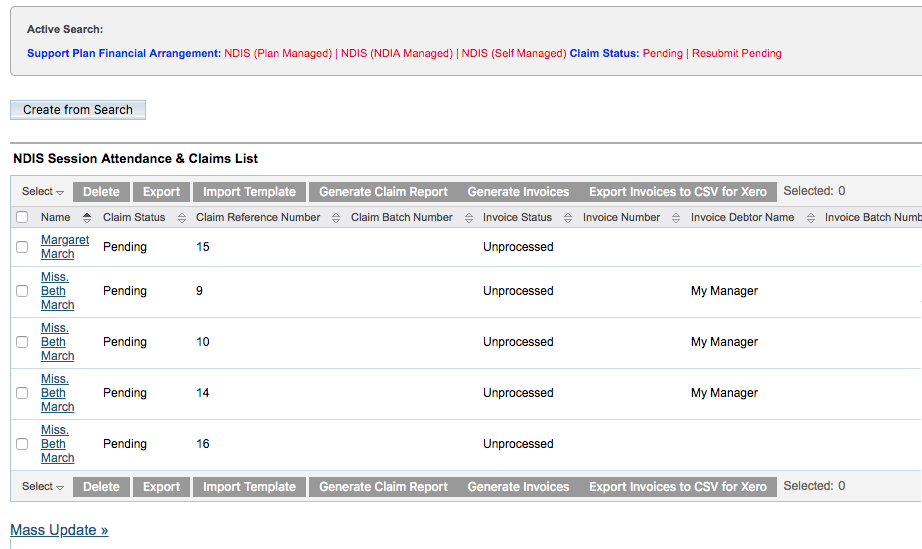
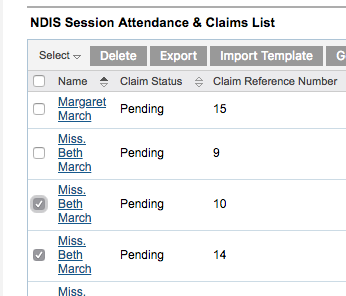
Step 8. Select the claims to submit.
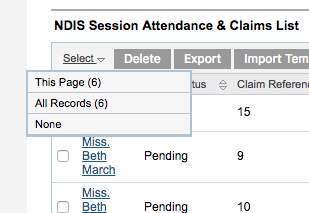
You can click the Select dropdown at the top of the list to select all records, or all for the current page.
You can also select individual claims by clicking the check-box next to the claim.
Step 9. Once the required Claims are selected, click Generate Claim Report
If any errors exist, the system will generate a file named: Errors_preparing_claim_report_<date>
Review any errors and resolve them or remove the claim from your list.
For assistance with resolving errors, refer to the NDIS – Create Claim Reports – Errors article.
Step 9. Once any errors are resolved or removed, click Generate Claim Report.
The NDIS Claim report is generated successfully

Step 10. Save the file.
Next Steps
Further Instructions
For further information, refer to the following articles: