The Community Data Solutions CRM system allows users with the manager role to manage the users of the database and their permissions.
Managers are able to create new users, change passwords if required, restrict or provide access to features/records and deactivate users.
Managers are able to:
– Edit User Permissions – restrict or provide access to features/records, deactivate users
– Reset User Password – change passwords if required
– Create New User – create new users
– Duplicate an Existing User – create a new user based on an existing one
– Create a Light User – create light users or change a user to a light user
Instructions
Step 1. Log into your CRM database (refer to Logging On for further information).
Tip: Only users with the Manager role have access to manage
users.
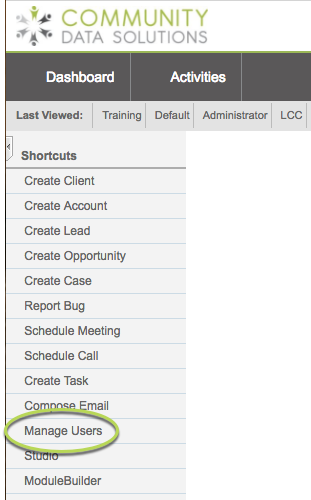
Step 2. On the left-hand side of the Home screen, click the Manage Users link.
You will be taken to the Users List page – current system users will be displayed.
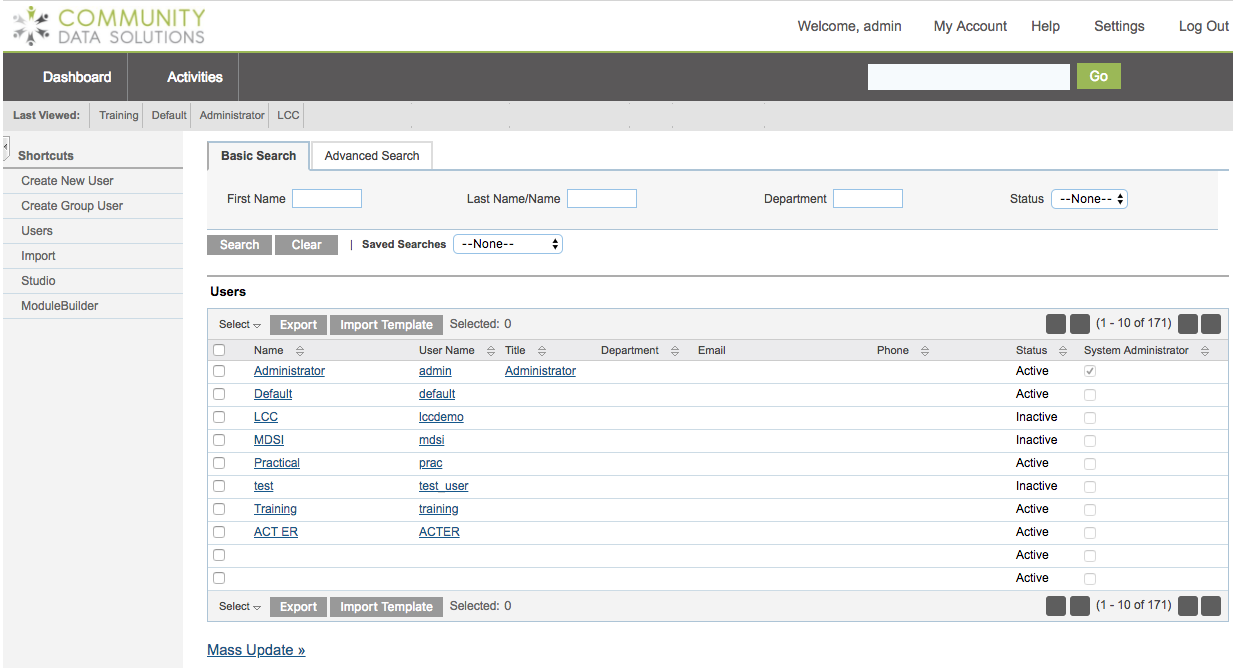
Step 3. Click Create New User on the left-hand side menu

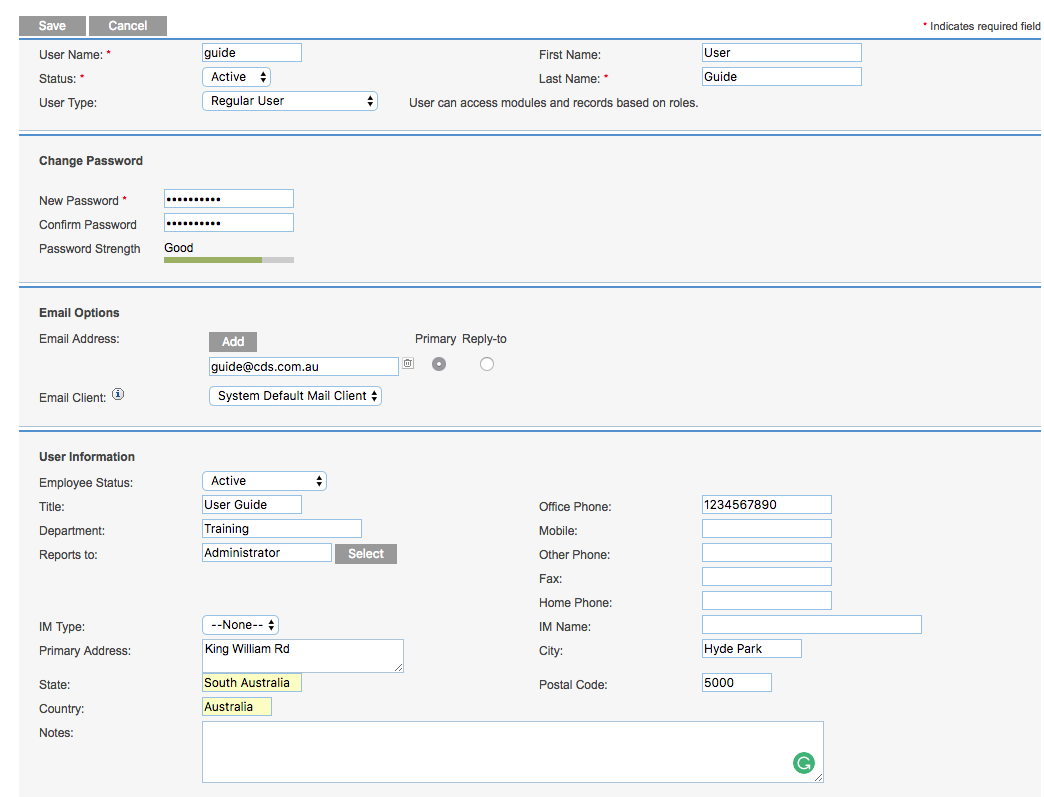
Step 4. Complete the required information in the following panels:
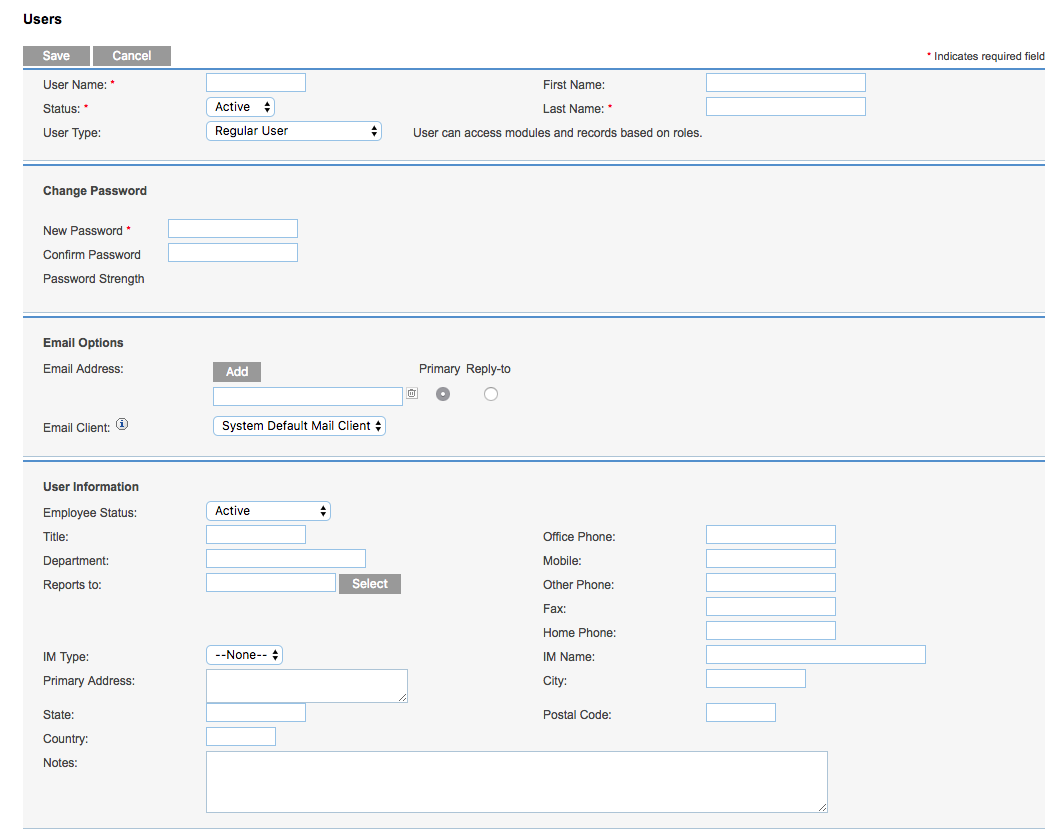
- User
- Enter a User Name as required (usually first initial last name – e.g. jsmith)
- Note – Status must be set to Active for the user to log in
- Change Password
- Enter a password for the new user – they should change it once logged in
- Email Options
- Enter the user’s email address
- User Information
- Enter the remaining user information as required
Do not edit any information in the following panels:
- User Settings
- Layout Options
- Locale Settings
- Calendar Options
Step 5. Scroll to the bottom of the page and click Save
The user is created successfully with the Basic role assigned


Next Steps
Further Information
For information on editing the permissions for a new or existing user, refer to the Editing User Permissions article.