This Article will assist you on how to use the Delete Action Tool in your CRM database, the Delete Action Tool’s purpose is to Delete a Record and Records that relate to it.
The Delete Action is a new Tool in Community Data Solutions (CDS) CRM Databases and may or may not be available yet in your CRM Database.
When it is available It will only available to users with the permission to use it.
Community Data Solutions has worked with your organisation to set up several categories of user permissions. Depending on which roles you have been assigned, you may have different levels of access than your colleagues.
Roles are used to determine which functionality you have access to, as well as the level of access. e.g. A Financial Counsellor may have access to create clients and add Financial Counselling cases, but not to delete clients or add Emergency Relief information.
The deletion of clients, cases, sessions, documents and other records are limited as this can not easily be undone if an item is deleted in error.
If you need to change your permissions, please consult your system manager. Users with the Manager role assigned can create and edit system Users, allowing them to update your permissions if required.
Instructions
Step 1. Log into your CRM database (refer to Logging On for further information).
Step 2. Search for the Record you want to Delete.
Tip:
Example below is for a Client Search but you could search for client, contact, enquiry, Community Education Case, Case Management Case or any other record that you want to Delete.

Step 3. Open the Record you want to delete.
Tip:
You will only see the Delete tab at the top of the record if you have permissions assigned to you.

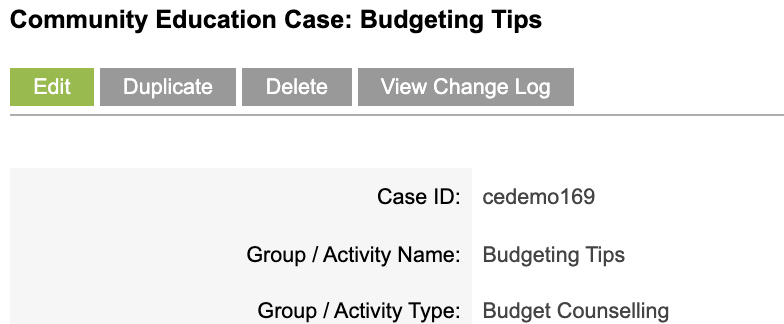
Step 4. Click on the Delete Tab to Open the Delete Action Tool

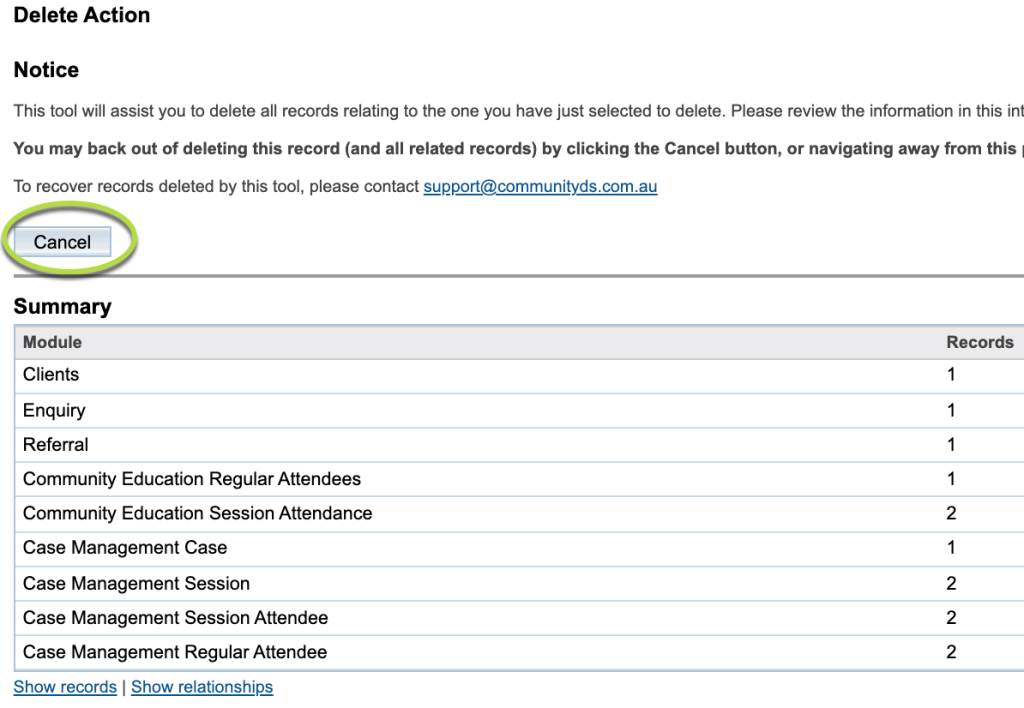
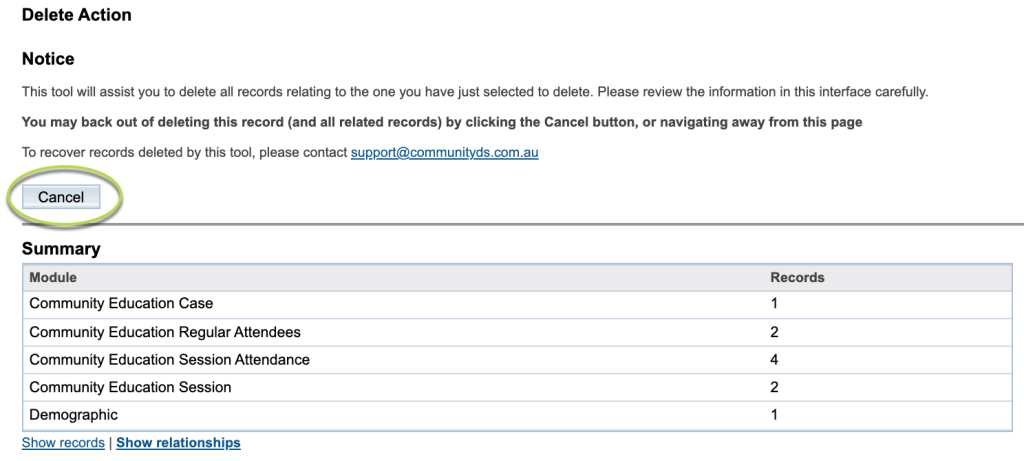
Below you can see an example of the Delete Action tool screen that you will be taken to.
The Summary Section lists the Module and a count of the Records to be deleted.
If you have entered the Delete Action Tool screen and don’t want to delete a record go to Step 9.
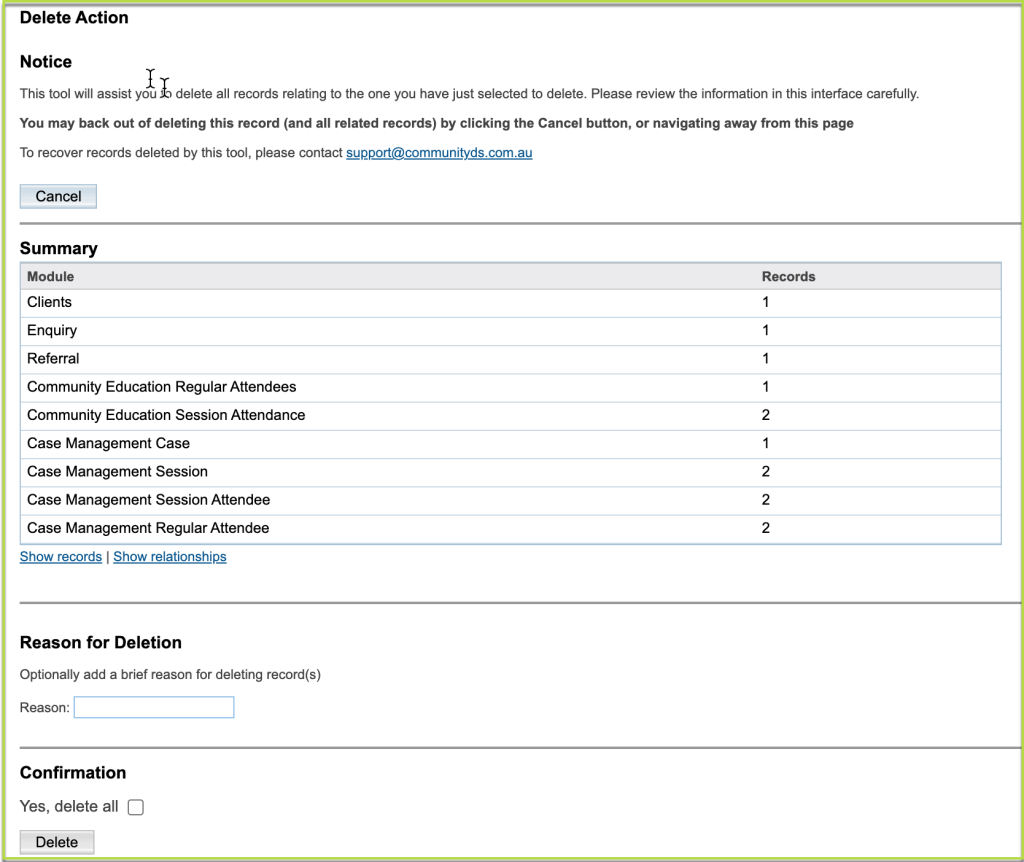
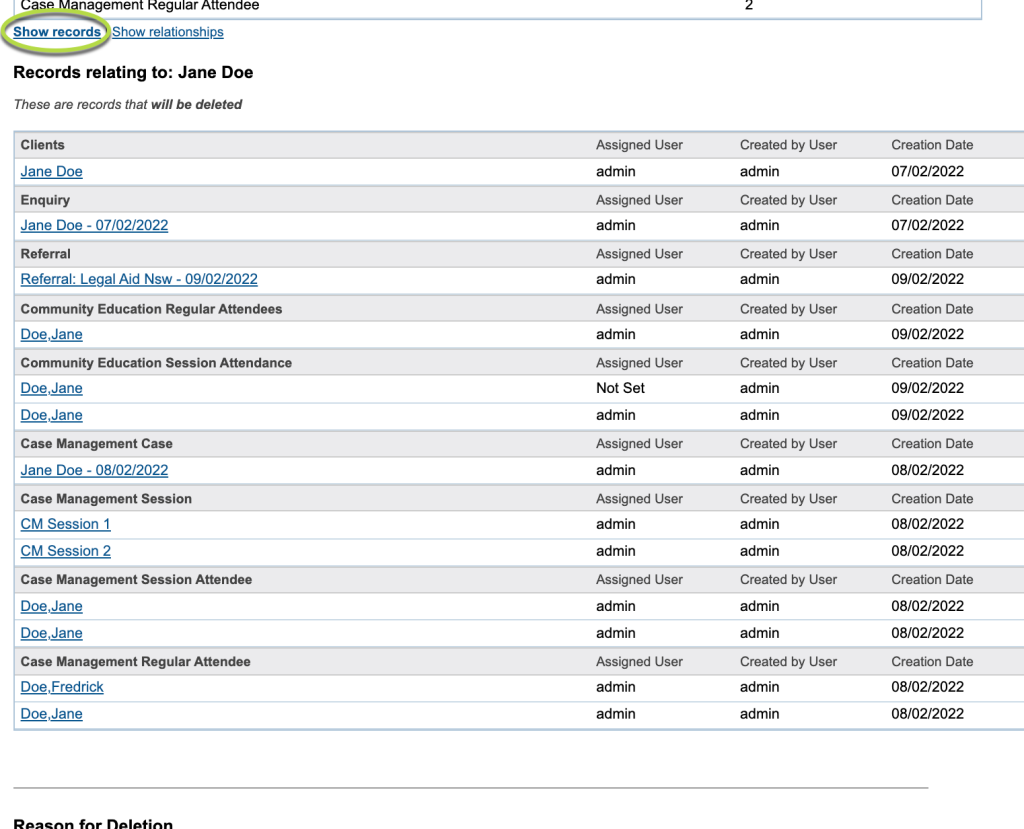
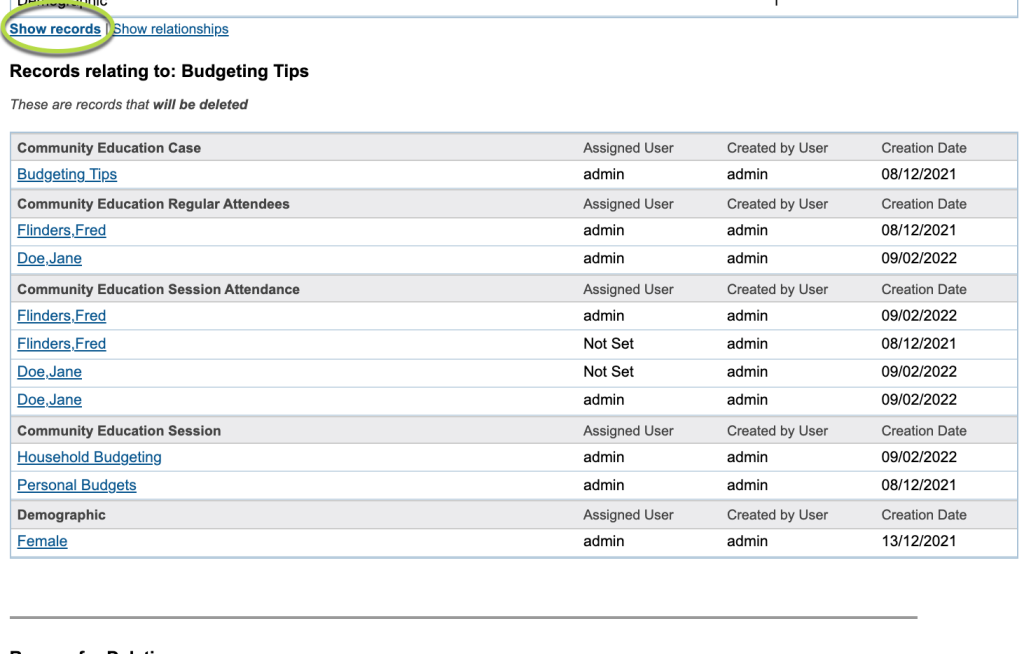
Step 5. Click on Show records and have a look at what is in the list. What you see is the Record and its Related Records that will be Deleted.
If there is an Record on the list that you Don’t Want to Delete Go to Step 9.
Tip:
For example if you had searched for a Community Education Case and clicked on the Delete tab for it, you would only be deleting that Community Education Case and what was in the Related Records for the Case.

The first Example below is for a Client Record and all related records of the Client.

The Second Example below is for Community Education Case and all related Records of the Community Education Case.

Trying to understand what a Related Records are, think CRM Database "Sub-Panel" on the left of a Record.
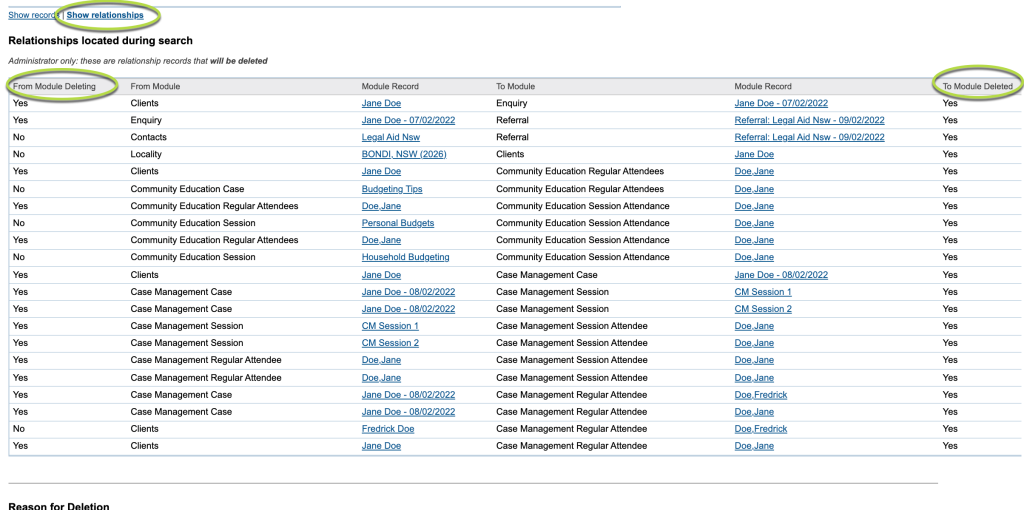
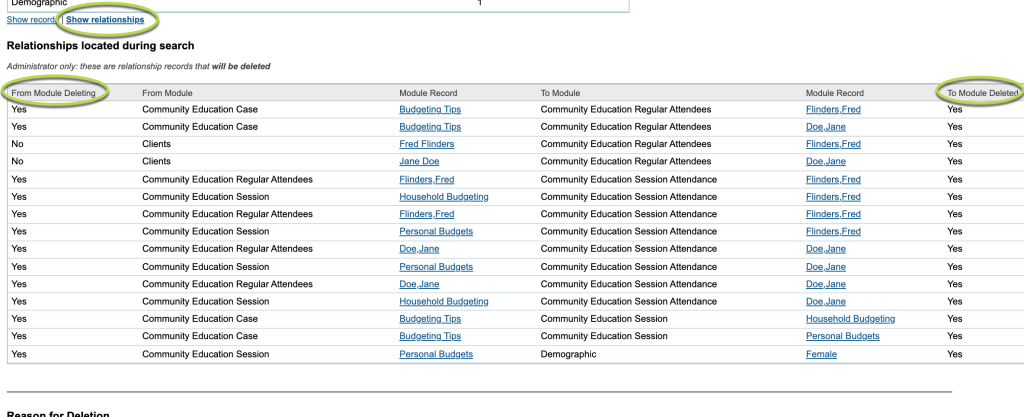
Step 6. Click on Show relationships and have a look at what is in the list.
Record:
Look at the first column From Module Deleting, a Yes in the column indicates the Record that will be deleted in the second column From Module .
Related Record:
Look at the last column To Module Deleted, a Yes in the column indicates the Related Record that will be Deleted in the fourth column To Module.
If there is an Record or a Related Record with a Yes in the column/s indicating that it is to going to be Deleted and you Don’t Want to Delete Go to Step 9 .
Tip:
The first Example below shows the relationships from the Client Record to its Related Records.

The Second Example below shows the relationships from the Community Education Case Record to its Related Records.

Trying to understand what a Related Records are, think CRM Database "Sub-Panel" on the left of a Record.
Step 7. Go to Reason for Deletion and type in the reason you are deleting.
Tip:
Entering a reason is an option BUT it is good practice to enter something here for reference.

For example you may be deleting because there is duplication so you would enter "Duplicate Record"


Step 8. Go to Confirmation. Click on (tick) Yes, delete all. Then click on the Delete button.
If you have changed your mind and Don’t Want to Delete Go to Step 9 .


Step 9. At anytime while you are still in the Delete Action Tool’s screen, you can click on the Cancel Button. This will Cancel the Deletion of the Record and its related record/s and take you out of the screen.
Further Information
For more information refer to the following articles:
