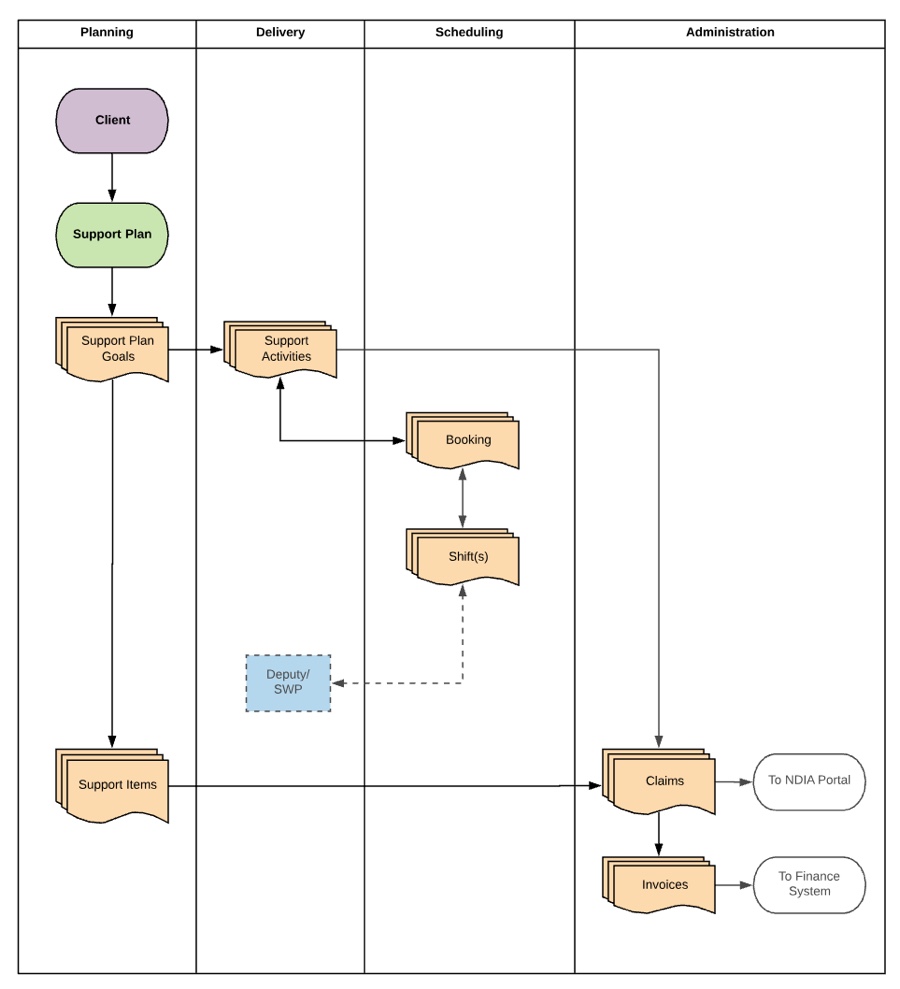
Once the Client’s Support Plan details have been completed, Support Activities can be planned and booked.
The following instructions follow the recording of a planned support activity and the creation of a booking record.
Instructions
Step 1. Log into your CRM database (refer to Logging On for further information).
Step 2. Search for the required NDIS Client.
If the client you need does not exist in your database, continue with the creation of a new client, ensuring the Client’s NDIS number is captured.
Step 3. View the Client record
Step 4. Scroll to the NDIS Support Plan sub-panel.

Step 5. Select the required NDIS Support Plan
The NDIS Support Plan page is displayed
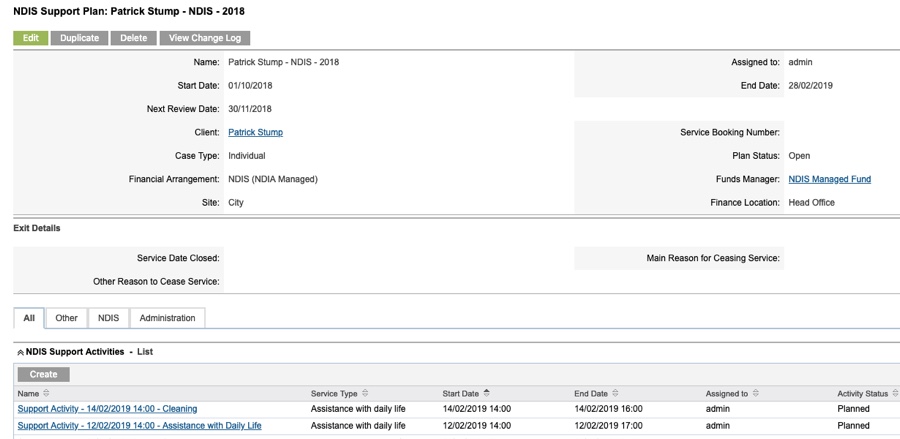
Step 6. Scroll to the NDIS Support Activities sub-panel

Step 7. Click Create

The NDIS Support Activity window is displayed

Step 8. Enter the required information
- NDIS Service Booking: Service Booking that this activity relates to
- Click Select to choose from the configured Service bookings
-
- Service Type: NDIS Service type this activity relates to
- This field is automatically populated when the service booking is selected. If multiple service types are linked to the selected service booking, ensure the required service type is selected.
- Subject: a brief description of the activity
- This field is automatically populated when the service booking is selected
- Contact Type: contact made with the client for this activity
- Select from the drop-down list
- Start Date: Start date and time of the activity
- As this is a planned activity, the start date must be in the future
- End Date: End date and time of the activity
- As this is a planned activity, the end date must be in the future
- Indirect Hours: any time spent preparing for the activity
- Distance Travelled: any kilometres travelled to perform the activity
- Service Type: NDIS Service type this activity relates to
-
- Location: where the activity will be performed
- Location Name: if another organisation, select the location name from the contacts page, you can also add a new contact.
- Notes: any notes related to the activity. These notes will be included in the created booking.
- Actions: details of the actions of the activity
- Assigned to: defaults to the current user
- Activity Attendees: attendees of the activity
- When created from the Client NDIS Support Plan, the Client will automatically be added.

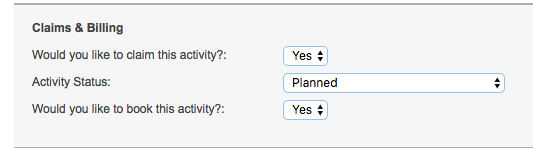
Step 9. Enter the Claims & Billing information
- Would you like to claim this activity?
- Select Yes
- Activity Status
- Select Planned
- Would you like to book this activity?
- Select Yes
Step 10. Click Save
The Booking page is displayed

Tip: The booking process may be configured
differently for every database.
Creating a booking creates a record, but does not
create a calendar reminder.

Your database may be configured to automatically
create reminders or bookings into another system.
Step 11. Enter required information
- Booking Information
- Confirm details populated from the Activity are correct.
- Service Required
- Confirm the service type populated from the Activity are correct.
- Service Location
- Confirm the Booking Location populated from the Activity are correct.
- If the location is not populated, check that the correct location was selected in the activity and that the location record is populated for the client/contact.
- Shift & Employee Information
- Select Number of shifts
- This will default to 1 shift. If multiple workers are required for this activity, select Create 2 or more shifts.
- Tick check box if support worker scheduling is required
- Select Support Worker if required.
- Select Number of shifts
- Support Delivery Notes
- Enter any notes or description required for the activity
- Internal Notes
- Enter any client request information
- Booking Recurrence
- For a single activity/booking, select One-Off
- For instructions on creating a recurring booking, refer to Create a recurring booking.
- Booking Rostering
- Select No to Use as Template for Rostering
- For instructions on creating a rostering template, refer to the articles in the Scheduling category.
Step 12. Click Save
A booking is added to the support activity record

Step 13. Click on the Booking record to view.
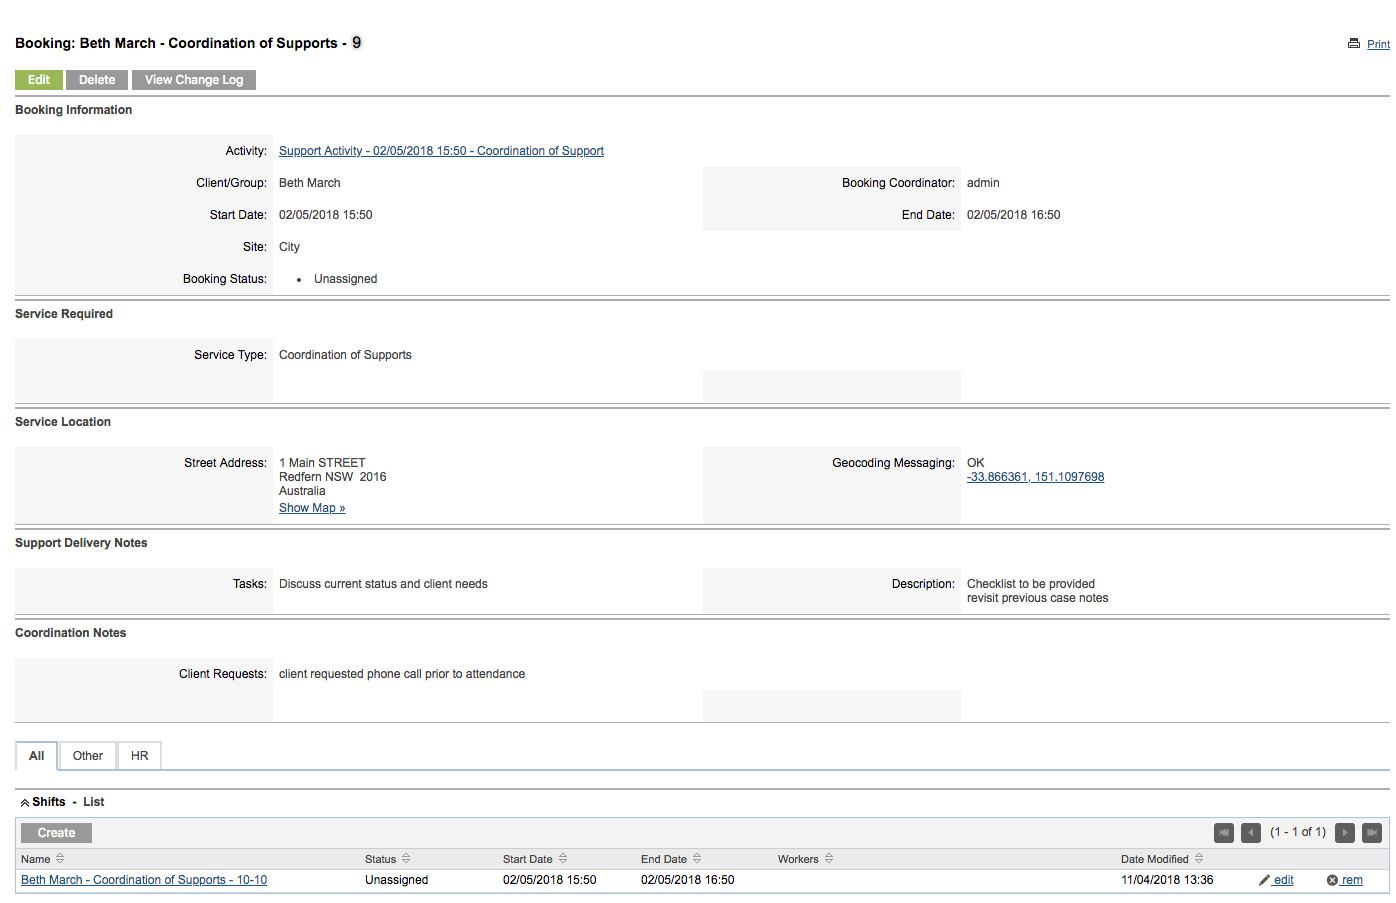
Step 14. Scroll to the shifts subpanel

Shifts have been created for the booking – status = unassigned.
Tip: If a support worker was selected during the creation of the Booking, the status would be assigned and the worker name listed.
Next Steps:
- NDIS – Record Session Attendance
- NDIS – Cancel Planned Individual Activity (Cannot deliver Service)
- NDIS – Cancel Planned Individual Activity (No Show)
- NDIS – Cancel Activity Booking – Bulk
Further Instructions
For further information, refer to the following articles: